
How To Build and Install Raised Garden Beds
How To Build Raised Beds
This article deals with how to build raised garden beds, what is the best size to make them and what is the best material to use. We will also look at preparing the soil, what to grow in raised beds and where to place them in the garden once you have them.

What Is The Best Size For Raised Beds?
Raised bed gardens are just containers for soil which can be built to any size to suit the space you have available. Keep in mind that the smaller the amount of soil in the bed, the quicker it will dry out so a large bed is better than a small one if you have the room.
Raised beds are all about easy gardening, so choose a width that allows easy access to the middle of the garden bed from either of the sides. Around 3 or 4 feet is the optimal width for most gardeners. Try gardening from a fixed position and find your furthest comfortable reach across the be; then double this to get the ideal width for you.

Premier 22.5cm FSC Timber Raised Garden Beds
View ProductIf possible try to avoid overly long beds so people don't get tempted to step across them to reach the opposite side. 6ft - 8ft long is perfect. Leave adequate pathways between beds: you should be able to move easily between them, so leave approximately 30 cm for foot traffic or 45cm for wheelbarrows. Allow extra for wheelchair users if needed.

What is the Best Height for a Raised Bed?
Next think about height. 7 inch high raised beds are ideal to start off with, and are perfectly suited to growing shallow root crops. Before deciding on a height ask yourself 'How much bending down do I want to do/can I do?'. Taller raised beds will make gardening much easier for those with mobility issues or experiencing back strain.
We stock raised beds in a range of different sizes and heights to suit as many gardeners as possible. Easy Access or accessible raised vegetable beds are also available which are constructed at waist height, both to eliminate bending down and to accommodate wheelchair users.

1 Metre Vegtrug Trough Planter
View ProductHaving settled on a size, the raised bed must be capable of containing the weight of the soil when wet. Taller raised beds may need to be reinforced to prevent bowing. This can be done using timber cross supports across the width of the bed or by driving steel reinforcing bars (rebar) into the ground at the outside of the bed mid-length. If in any doubt just give us a call, we are always delighted to help.

What Material To Use
Beds can be built from brick or stone but we like to use timber, as it is quick and easy and looks great when planted up. We supply a broad range of treated timber raised bed kits, but you can also make your own with waste timber if you wish.
The advantage of treated timber for vegetable beds is that it has a life of between 10 and 15 years depending on the thickness of the wood. Untreated waste timber will probably last 2-3 years.
Be careful not to use timber which has a chemical treatment or a lot of paint as these can contain lead which can end up in your soil, your plants and then in you! Similarly old railway sleepers aren't a good idea as they are soaked in creosote, which won't do you much good either.

120cm Square Allotment Raised Bed Flatpack Kit - 17.5cm high
View ProductThe first question you should ask yourself is 'does it fit in with existing garden design?'. Nobody wants their vegetable garden to look out of place. Timber is the most popular material used because it has a natural look and fits in to most garden designs. The wood can be painted or stained to match existing garden furniture or fencing, but just make sure to use a water based paint or stain that is safe to use with food crops.
Timber raised beds all have an approximate lifespan. Our timber planters are pressure treated and will last approx 10 years, but can last longer depending on local weather conditions. Blocks, bricks, and concrete can be used to make a more permanent raised bed but timber boards are cheap, easy to construct (and move) and don't require foundations. Moulded plastic can also be used, and is now available with a wood finish effect to mimic the standard timber version.

Preparing The Ground For Raised Beds
Break the soil surface on the ground where the bed is to be placed down to a depth of approx 30cm, and remove rocks and debris that might obstruct healthy root growth. This won't be an issue with shallow root crops but for deeper root crops like carrots, parsnips and potatoes, good soil preparation will make all the difference. For beds of 14 inches high or more, you need only strip the grass sod off the surface and invert before filling the bed with soil.
Look out for any roots from nearby trees: as a tree grows, it sends its roots out laterally as well as down in search of nutrients in the soil. Tree roots spread over a surprisingly large distance and can sneak in and steal the nutrients from the soil in your raised bed!

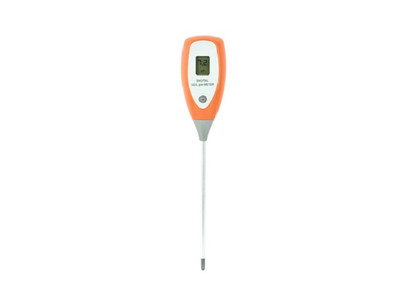
Check the ph levels with a simple soil test kit and adjust as required. Most soils - unless very acid or alkaline - may only need minor adjustments if any. As a rule of thumb most vegetables will be happiest at a slightly acid PH of 6.5, with some exceptions like blueberry plants which like a very acid (or ericaceous) soil of about 4.5.

PH & Moisture Meter
View ProductAcid soil can be balanced using ground limestone which adds calcium, whereas an alkaline soil (more unusual) can be rectified over time with the application of compost. Of course the beauty of using raised beds is you can add or 'build' the soil you need for your intended crops if the soil on your site is unsuitable.
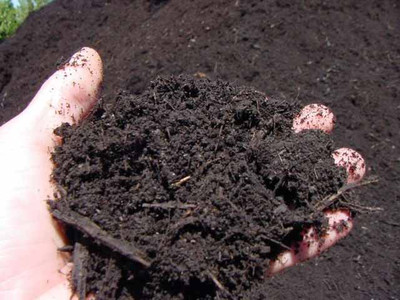
In general the darker the soil the better, as dark soil contains more organic material than light. Organic material is what feeds the biology in the soil (good bacteria, earthworms etc...) and convert it into food for your plants; it is the good stuff.

We can't stress enough the importance of soil in the vegetable garden. It is the secret to 'green fingers' as a well fed soil grows healthy resilient plants, while plants on poor soil will struggle and are more prone to pests and diseases.
With vegetable plants, most of their roots are in the top 6 inches of soil which will be within the raised beds. Remember to keep this soil nice and light and well aerated, so the roots can access nutrients easily. If you need to improve your soil use bulky organic matter like well rotted manure, garden compost or soil improvers.

Bulk Bag Of Organic Compost - England & Wales Only
View Product
Building large raised beds using planks and timber stakes
One of the easiest ways to build raised vegetable beds is to use planks of wood and timber stakes for support. This method is particularly good if you are using more than 8ft lengths of timber to create beds. This is the method I have used in my own garden, where I have a grid of 20ft beds intersected by gravel pathways.

Create your beds by dividing up your plot with gardening twine and sticks to mark the location of your raised beds and your paths. I would recommend your beds shouldn't be wider than 4ft, as anything wider makes it difficult to reach the middle of the bed. Your paths should be a comfortable width for a wheelbarrow while not taking up too much of the available growing space. I would suggest 3ft is about right.
You can see my paths in the picture between my raised beds (which I made a little too wide!) before I put the weed control fabric and gravel down. You can also see the 9 inches of soil flanked by the timber sides.

To make your new raised beds simply shovel the soil from the path area into the centre of the bed area. Make sure you do your digging and earth moving when the soil is reasonably dry as soil structure is damaged by working wet ground.
Hammer timber stakes or rebar (rebar is short for reinforcement bar, they are lengths of steel bar, ask in your builders supplier) along your string line ensuring at least a third is buried in the ground.
Lean the timber raised bed boards against the inside of the supports and pull the soil up against them to hold them in place. There is no need to fix the boards to the supports as the weight of soil in the bed is pushing the planks firmly against the posts. To keep weeds in the pathways under control I have also added a layer of 'Mypex' weed control fabric covered in pea gravel in my garden which keeps the garden looking tidy and makes it much easier to manage.

Can I Build A Raised Bed on a Hard Surface?
It is better to place beds on grass or soil to make the most of soil depth and moisture, but raised planters of sufficient height can be placed on a hard surface.
If your beds are to be built on a hard surface like concrete or patio slabs, use a sheet of Mypex weed control fabric to line the bed. The 'Mypex' is semi-permeable, so it will allow excess water to seep out while preventing soil particles from escaping around the base of the bed.

Mypex Weed Control Fabric 1.5m wide
View Product
How to Build a Raised Garden
I include a plan for our timber beds which you can copy if your have your own wood or lumber. Any length over 6ft (1.8m) in length will need a cross brace support in the middle, or the weight of the soil will cause the timber to bow out. We would also recommend using timber of at least 2cm thick.
How to build a 6ft x 4ft x 14 inch high raised bed
In this case we are building a 14 inch high bed which is suitable for a broad range of deep and shallow root vegetable crops. Your beds can be any height, simply adjust the number of boards and height of corner posts accordingly.

You Will Need:
4no. 3in x 3in x 14in high corner posts.
4no. 6ft x 7in high planks (we recommend a thickness of inch and a quarter).
4no. 4ft x 7in high planks.
32 no. 4x50 self tapping wood screws.

Step 1: Take 2 of your 4 ft lengths and place them face down on the ground. Take 2 corner posts and place them under each end, as if you were making a miniature coffee table as shown in the illustration. Make sure the posts are aligned neatly with the edges of the boards, and fix using 2 screws per plank. Avoid screwing too close to the edge of the plank, to give a stronger fix and to avoid the timber splitting.
Repeat the process for the other 4 ft lengths so you have two identical ends.
 Step 2: Stand one of the ends of the bed up and fix the long 6ft planks to the corner posts. If the site you are working on is uneven, it helps to use one of the 6ft planks as a base to make sure the bottom board is square and to the right height. Once the bottom board is correctly fixed, the next one is easily positioned on top. Screw your fixing in to the the corner posts rather than the ends of the 4 ft boards, as this gives a better fixing.

Step 3: Repeat step 2 until you have all 4 corners completed. If you are building a long bed, another end piece of the same size can be used to brace the middle of the vegetable bed. This is why we fix the raised bed ends inside the long side planks.
The bed is strong enough at this stage to move around the garden; do this by lifting the end and dragging it to the desired spot.

What Can I Grow In Raised Beds?
Almost anything can be grown in raised vegetable beds. They are perfect for an organic kitchen garden, but can also be used to create a fantastic tiered ornamental shrub and flower garden.
Most vegetables, fruit, and salads, and pretty much all herbs can be grown with greater ease and success than planted straight in the ground due to the greater soil depth. Raised beds are also particularly useful in areas with high rainfall as they provide extra drainage, meaning you can successfully overwinter crops like onions, garlic, parsnips and carrots.
You can vary the height of your garden beds to suit the crops you wish to plant: with lower beds (7 inches high) for shallow root crops like salad and spring onions, and deeper beds for carrots, parsnips and other root crops.

Planting By Height
Arrange crops at planting time to ensure smaller plants aren't having the sun blocked by taller plants. If you plant a range of vegetables, for instance, in a raised garden, the plants will reach maturity at about the same time. Taller vegetables like peas, beans, peppers, and brussels sprouts will begin to overshadow shorter crops like lettuce and radishes etc, depriving them of the sun. The best position for your raised beds is facing south, with the tallest crops placed at the northerly end of the bed.

Portable Raised Planters / Containers
If your garden isn't large enough to grow in raised beds, you can still grow a surprising amount of fruit and vegetables using smaller containers. We also supply mobile raised beds which can be moved around a small garden to achieve maximum exposure to sunlight, or to move to one side when entertaining.
Soil or compost choices in container gardening are a little different than growing in larger planters, as you will need to use a more compost based soil. This is because smaller volumes of soil are unable to hold enough moisture for healthy plants. For smaller containers use compost only, while large pots (too big to move when full) can be filled with a 20% soil and 80% compost mix. Remember due to the smaller growing space and limited nutrient availability you will need to add extra feed to your plants. We recommend a natural feed like our 'Seafeed' seaweed and manure pellets.

Watering is always an issue in urban gardening so before filling it, ensure your planter has adequate drainage and is strong enough to contain it's fill of soil when wet. It is also much handier to arrange your pots to your liking before adding compost and planting up. They will be a lot more difficult to move when they're full!
Help and advice
Please feel free to contact us if you need any help and advice with your growing, we are happy to help anyone interested in growing whether our customers or not!

