How To Secure A Polytunnel To the Ground

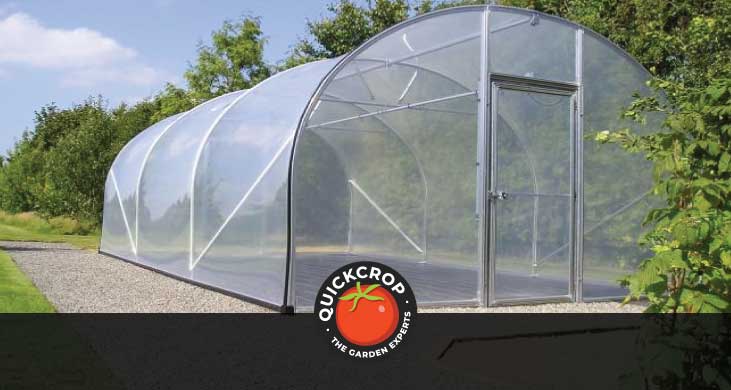
When setting up your polytunnel, it's important to make sure that it's fixed securely to the ground. It's a long-term structure and you want it to be able to withstand all kinds of weather conditions. Strong winds can dislodge a polytunnel that hasn't been fully secured. What is the best way to go about securing the tunnel to the soil or ground? There is a choice between two main methods depending on what you prefer.
What Are The Best Weather Conditions In Which To Secure a Polytunnel?
First off: it’s often recommended to set up a polytunnel on a warm and calm day. The thinking behind this is that the warm temperatures will enable the polythene cover to stretch naturally and fit tighter around the frame. Polythene can shrink in colder temperatures, which could mean that when the weather changes the material starts flapping. However, it’s not essential for the weather to be warm, and besides: many people will be first setting up their polytunnel in the early months of the year when the weather can still be a bit chilly. What is important is to avoid doing the job on a windy day, as this can make things pretty difficult and aggravating!
How Many People Do I Need To Help?
When setting up and securing your polytunnel, you want it to be a two-person job at the very least - but the more the merrier (not to mention easier). Four or five people is ideal, as that way you can cover all four corners and have a fifth person to tighten the cover or add soil to the trench. The bigger the polytunnel, the more unwieldy it can be to handle with only one or two people.
How To Measure The Area Needed
The first thing to do when setting up your polytunnel is to mark out the area with posts and string. Measure one side from end to end and use posts as markers. The corners should be square with equal measurements between them. You can refer to the construction guidelines or instructions that come with your polytunnel for exact measurements.
Foundation Tubes
Foundation tubes can be positioned at each end for the door frame. It’s a good idea to attach anchor plates to the foundation tubes for stability. The anchor plate is buried at the bottom of the hole using clamps. If the hole is then filled with soil, this will stop the foundation tube from being pulled out in severe weather conditions. Anchor plates or base plates are vital if using the base rail method of constructing the polytunnel. Essentially both of these plate types serve the same function: anchor plates are used when you are erecting the polytunnel on a soil base, while base plates will be necessary if you are setting it up on a hard base such as concrete. In the latter case, base plates can be used in place of foundation tubes to bolt the polytunnel hoops to the concrete.
When hammering in the foundation tubes, use a thick block of wood to absorb the blow so as not to damage the tubes. Drive the tubes into the ground until all are at a level height. The tubes should be exactly vertical; if not, the hoops may tilt at weird angles. Avoid having the hoops more than 2 metres apart.
Connecting the Polytunnel Hoops
Fit the hoops into the foundation tubes. They should slot or fit in pretty easily; the key thing is to ensure that they are vertical and not slanting at angles. Next, fit the ridge bar and side bracing bars. Double check that the hoops are vertical and correctly placed, and then start tightening up the joints.

Burtown Kitchen Diary - How To Build A Polytunnel
View ArticleOne key way of protecting the longevity of the polythene cover is to apply some anti-hot-spot tape to the framework, particularly on areas of the frame that come in close contact with the plastic. This forms a protective barrier between the polythene and the frame. If the barrier isn’t there, there is potential for these areas to overheat in direct sunlight, and thus damage the cover.
Trench Method or Base Rail Method?
If you go with the trench method, this involves digging a trench about 8 inches wide by 8 inches deep. This should go all along the edges of the polytunnel apart from around the door frame. When the polythene is stretched tight around the frame, the idea is to then push the excess polythene at the edges into the trench, before shovelling plenty of soil over it. This will keep the polythene cover naturally anchored in windy weather.
Unroll the plastic along one side of the frame and lift the cover so that it slides over the tunnel. Depending on how many people you have helping you on the job, it’s best to have a person in each corner holding the plastic tight while one person shovels soil into the trenches. When you repeat this process on the other side, it’s a good idea for someone to stand (gently does it!) on the cover in the trench to apply extra tension and tightness to the cover.
The crucial thing in terms of ensuring that your polytunnel is secure and durable is that the plastic cover is tight when you have fitted it. There should be very little give, apart from a bit of looseness around the door frame. This will ensure that the plastic doesn’t move around much or get damaged in windy weather. It also prevents rainwater from building up on the roof of the tunnel or in loose patches along the sides.

A Guide To Polytunnel Irrigation
View ArticleWith a base rail system the polythene is not buried, rather it clips onto either an aluminium or timber frame. This leaves a flap on the ground on either side.
The argument in favour of the base rail set-up is that it takes away some of the graft involved in digging the trenches and shovelling in soil. Many also believe that it makes things easier if you need to re-adjust the polythene cover. It can also make it easier to weed around the edges of the polytunnel. The base rail system can however work out as an extra expense to add to your polytunnel. You also need to be more precise with your foundation tubes and ensure that the tubes have metal brackets. As Charles Dowding points out, when using the base rail system the foundation tubes have a more important role in terms of keeping the structure secure in the ground; when using a trench, they are there more for adding extra stability to the structure rather than anchoring it. Dowding also advises concreting in the corner tubes, particularly if your polytunnel is on soft, boggy ground.
When using the base rails, it’s still a good idea to bury or tuck in tightly any polythene that extends past the rail. This will protect the polytunnel from garden pests and cold draughts. When the cover has been fully applied to the frame and the base rails, you can trim the excess edges with a scissors.
Next Steps
Once the sides have been weighed down or clipped on, it’s time to fit the polythene around the door frame. This is done by cutting a v-shaped flap below the mid-point of the doorway, before rolling the flap around a piece of timber. Pulling on the timber at each end will stretch the polythene tight over the length of the polytunnel and hold it in place.
Refer to the instructions of your polytunnel to see how exactly your door is fitted. An example of the typical way this is done is by positioning the door frame carefully under the end hoop. The door post will then be attached to the hoop (this can be done with a p-clip). Battens are usually nailed around the frame of the door. The plastic is stretched over this, and then a second batten is nailed on top of the polythene.
Ensure that the ‘pleats’ in the polythene at either end of the polytunnel aren’t too extreme, and that they are facing downwards as much as possible so that condensation doesn’t build up.

Tomato 'Gardeners Delight' Organic
View ProductProviding Additional Stability
Side bars add further strength and stability to the polytunnel structure. Placed diagonally at each corner, they prevent the end hoops from moving too much or falling out of their vertical position. The side bars can also be attached with p-clips.
Crop bars are usually an optional extra when it comes to polytunnels, but they’re recommended for extra strength and stability. These bars run from one side to the other at roughly head height. If you have a larger polytunnel or your tunnel is in an area that is often exposed to the elements, crop bars are a very good addition: you can be confident your polytunnel will remain solidly anchored. They don't just play a structural role either. Crop bars can be used for hanging baskets, suspending wires, or for supporting climbing plants like cucumber, tomatoes and beans.
For extra wind resistance, you can insert wooden stakes or corner stabilisers at the four corners.


