
How To Grow Tomatoes

Tomatoes are one of the most rewarding crops for the home gardener to grow, simply because their flavour is so much better than their shop-bought cousins. Tomatoes grown for the supermarket shelf have been bred to travel well and look good on the shelves for as long as possible; tickling your taste buds is not their number one priority.
Many commercially produced tomatoes are also grown in soilless (soulless?) environments using an artificial fertilizer solution, and picked before they are ripe. Both of these practices result in tomatoes that look nice but don’t taste great.
Research has also shown that organic, homegrown tomatoes have a much more complex chemistry than commercially produced fruits. In simple terms this = a greater depth of flavour, but it's also likely that homegrown tomatoes are healthier - with higher levels of the pigment ‘Lycopene’. Lycopene has been shown to help unclog blocked arteries, and is thought to be one of the reasons the Mediterranean diet is seemingly so beneficial.
The other big bonus with growing your own tomatoes is the amazing variety of size, shape, colour and flavour that is available. As with the potato (they are, of course, close relations), there is an almost overwhelming range of different types: from very large ‘beefsteak’ varieties to small and sweet ‘cherry’ fruits.

Basically, tomatoes are fun to grow and they give such a great reward that they have to be one of the stars of the home vegetable plot.
Where to Grow Tomatoes
Tomatoes are sub-tropical plants and therefore require a position in full sun. This is especially important in most areas of the UK and Ireland, where sunlight and warmth are at a premium even in mid-summer. A position against a wall or fence will give a better chance of success as long as they can receive sufficient water; avoid hedges as the soil will be too dry.
Tomato plants also grow very well in raised beds: they appreciate the soil conditions, which provide moisture without water-logging.

Premier 53cm FSC Timber Raised Garden Beds
View ProductIn cooler parts of the UK and Ireland tomatoes are better grown undercover in a polytunnel or greenhouse. In poor summers outdoor tomatoes can fail to ripen (especially larger varieties) or fail altogether.
Site and Soil
Tomatoes require a very fertile soil. Remember that a healthy plant may be up to 2 metres tall and produce hundreds of fruit while taking up a relatively small space (a cabbage takes up more room and only produces a single head!). Prepare your beds by adding plenty of well-rotted manure at planting time - as much as a full wheelbarrow every 3 square meters.
Tomatoes can also be grown in pots and growbags, but due to the restricted root space you will need a more intensive feeding regime. Make sure pots can hold at least 40 litres, and only plant 2 plants in a growbag. These conditions are not ideal, but may be the only option in a small city garden or if growing on a balcony.

Tomato Planters - 2 Pack
View ProductUse the best compost you can and feed with a generous amount of seaweed and poultry manure pellets when planting out. Also use a supplementary liquid feed or an organic seaweed feed.
Mycorrhizal Fungi
Tomatoes respond well to inoculation by mycorrhizal fungi, which build a symbiotic relationship (benefits for both species) with the plant. The fungi form a network of hyphae, which transport water and minerals to the tomato plant in return for sugars produced by the roots. Mycorrhizal fungi are available as a powder to coat seedlings when planting out, or as a coconut fibre 'biscuit' which is placed in the bottom of the planting hole.

Rootgrow Mycorrhizal Fungi 60g - 1kg Packs
View ProductA Guide to Tomato Types
As mentioned above, there are a whole range of tomato types and varieties. Briefly outlining the main types can give you a good idea of which ones you might like to grow, whether because they suit your growing circumstances or your culinary tastes. For a look at some of our favourite tomato varieties, see this blog post.
Most Popular Fruit Types
Standard: These are medium sized, smooth and round tomatoes, and the ones you are likely to see in the shops. They are usually red or yellow-skinned and are good all-purpose tomatoes.

Beefsteak Tomato 'Noire de Crimee'
View ProductBeefsteak: Large Mediterranean-style tomatoes which are excellent for sandwiches and salads (think tomatoes with mozzarella). Be aware that large tomatoes need a long season to ripen, so they are not suitable for growing outside in cooler climates. Beefsteak tomatoes are however well worth growing if you have a polytunnel or greenhouse. There are interesting and unusual variations, and of course good flavour.
Plum: The traditional Italian favourite for canning and making pasta sauce. Not always the best for fresh eating flavour, but they cook and freeze well.

Cherry Tomato 'Sungold' F1
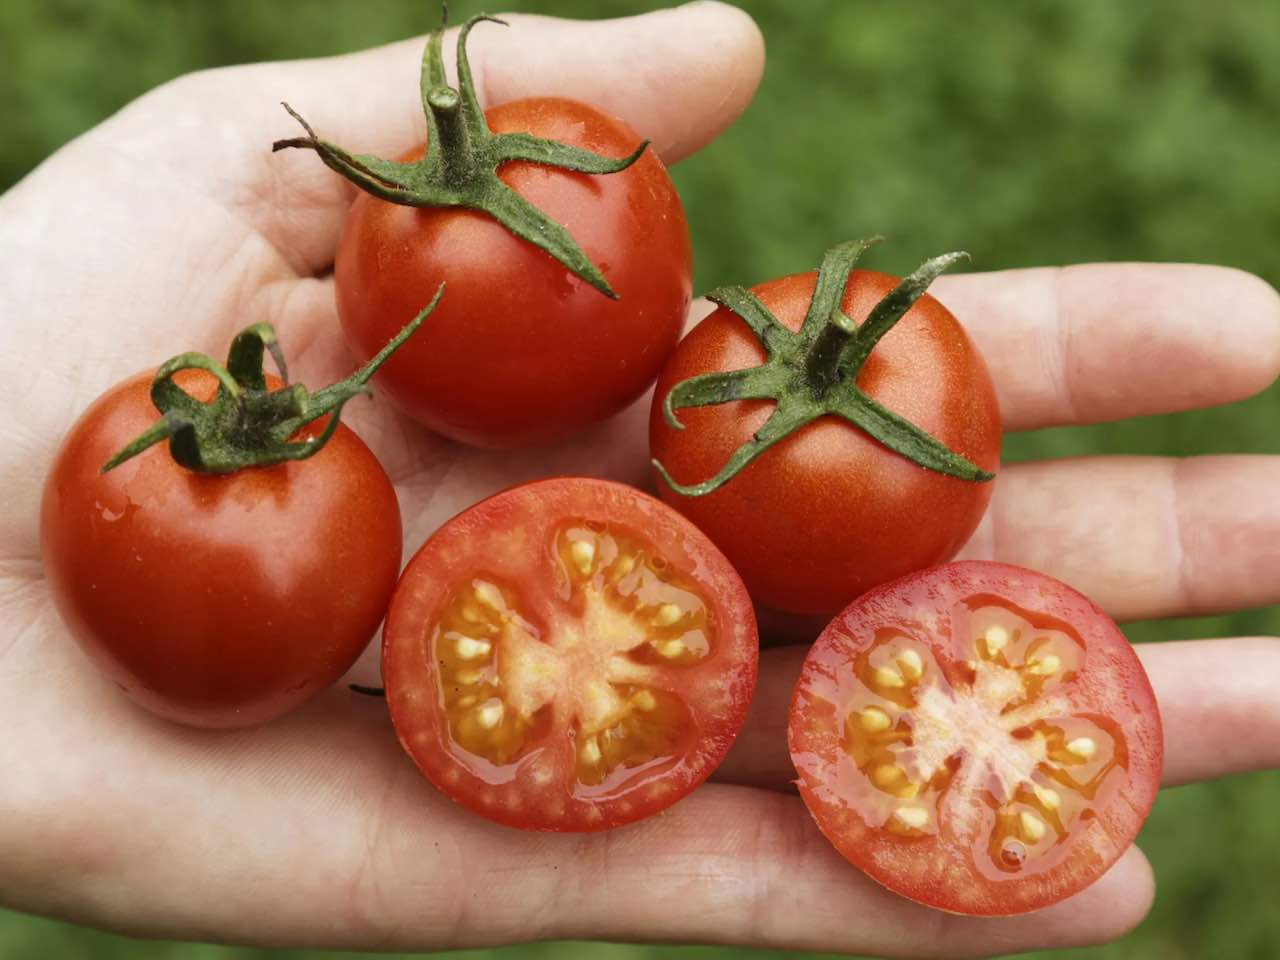
View ProductCherry: These are small, round fruits usually with excellent flavour. There are both red and yellow-skinned varieties, including the fantastic ‘Sungold’ which you absolutely must grow.
Tomato Growth Habits
Indeterminate or cordon varieties
The typical tall-growing tomato plants that most people will be familiar with. They are usually grown up twine or bamboo supports, and consist of a single long stem.
Cordon varieties produce side shoots which will grow into large lateral branches: these will need to be removed as they appear to maintain the required growth habit. Allowing the lateral branches to spread will result in a congested plant - and a lower yield of ripe fruit.
Determinate or bush varieties
These varieties are suitable for growing in containers, hanging baskets or anywhere where space is at a premium. Bush varieties don’t grow with a central stem and have a low-growing, sprawling habit - making them useful for growing under cloches or mini polytunnels.
Removing side shoots is not necessary as the bush is ‘self stopping’, usually achieving a 2-3 foot spread. With bush varieties fruits tend to be smaller and ripen relatively early.
Bush Tomato - Maskotka
View Product
Dwarf varieties
Very small and compact plants, growing no more than 8 inches high. Ideal for container growing. Dwarf varieties are great if you have a small covered raised bed like a Vegtrug, as they won’t outgrow the cover.
Sowing Tomatoes
Sow seed indoors in late February to mid March, using a heated propagator or a warm, south-facing windowsill. The temperature of the compost should be approx. 22 degrees celsius for the seeds to germinate. Young plants will also need to be kept warm until early summer, when the soil temperature is above at least 10 degrees.
Bio Green Jumbo Propagator
View ProductTomatoes can be sown in seed trays and pricked out to larger pots, but I prefer to sow in modular trays and pot on to a larger 10cm pot after the third leaf has formed. Seeds should be sown 2 cm or 3/4 inch deep in a low-nutrient seed compost and then potted on to a richer potting compost.
We need to achieve a balance with our seedlings at this point, as we are keeping them artificially warm at a time of year when light levels are not really sufficient. Too much heat and not enough light will result in tall and weak seedlings (because they grow fast assuming if there's heat there must be more light), so we need to reduce heat to a minimum (10 degrees) and place the plants in as bright a position as possible. If you are growing indoors on a windowsill you may need to provide extra light using a growlamp.

Plants grown in pots need to be spaced out when their leaves start to touch each other; this is to avoid overcrowding and plants becoming elongated and 'leggy'. The best tomato seedlings are short and stubby rather than tall and thin. Compost should also be kept moist and should never be allowed to dry out.
Transplanting Tomatoes
Where tomato seedlings have been started in pots or containers, they should be transplanted into their final positions when they are approx. 15cm (6in) high - before the roots become restricted by the pot or 'potbound'.
Where tomato plants have been grown under cover and you intend to plant outdoors, remember to harden them off for a week or two before planting them in their final outside positions. Hardening off means getting them gradually used to outside temperatures by leaving them outside on fine days and bringing them in at night. You leave them out for progressively longer until they can be left out at night (provided all risk of frost has passed). This is especially important in the UK and Ireland, because May and June can often be cool and windy.

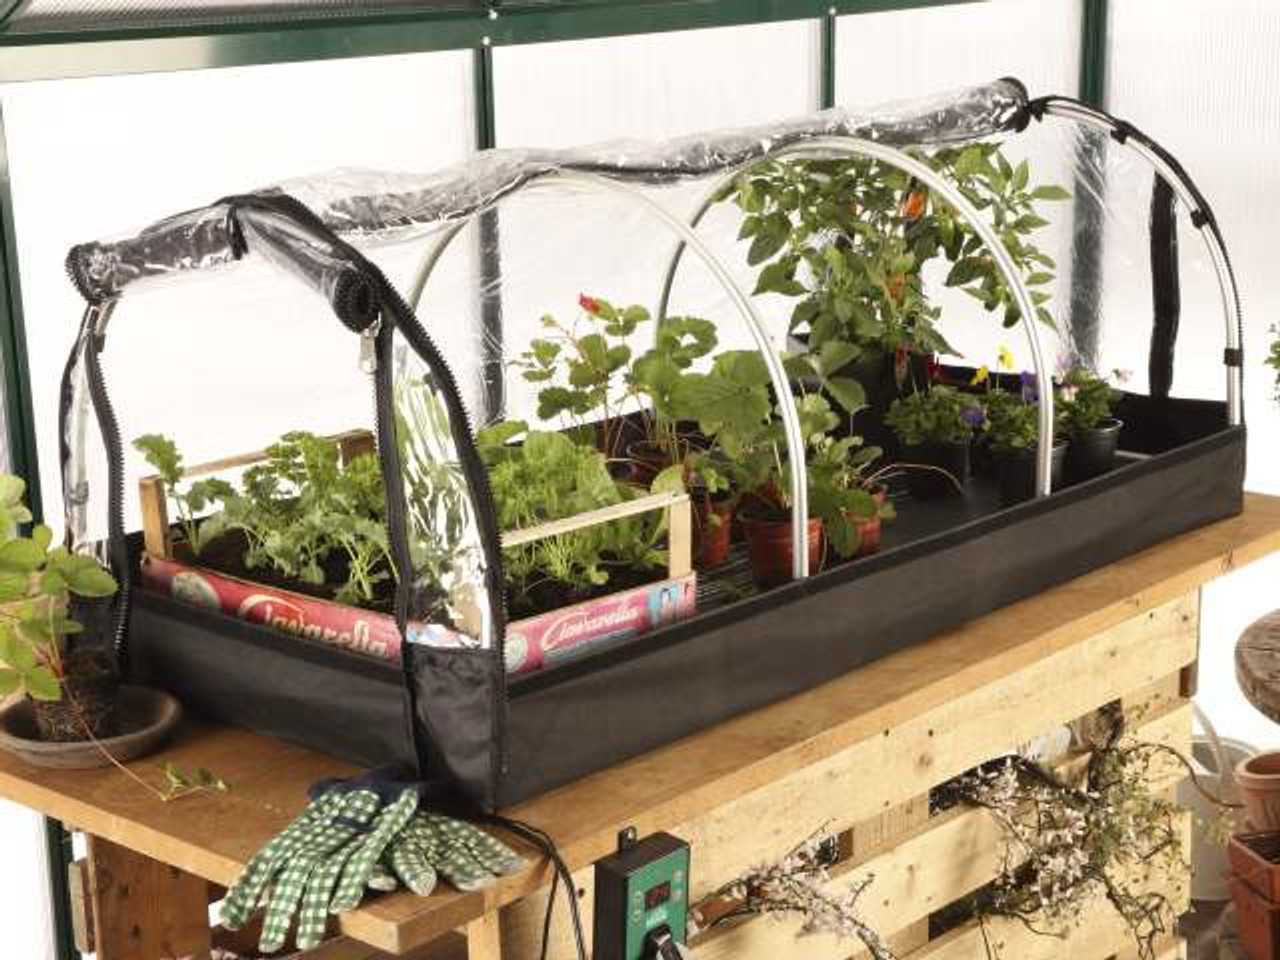
Small Space Cold Frame
View ProductDig a hole for each plant (45cm / 18in apart) in the bed to about 5cm / 2in deeper than the pot.
If you are growing indeterminate or cordon varieties you will need to provide support. You can do this by burying a length of twine under the root ball when planting and tying the other end to a support above the plant; this is easy in a polytunnel where you can tie the twine on to crop support bars. For outdoor planting there are a wide range of tomato supports available.
Ease the tomato plant out of the pot, keeping the root ball undisturbed as far as possible. Place it in the hole and fill around the plant with soil. The soil should be 5cm / 2in higher than it was in the pot. Planting tomato plants deeper in the soil than in the pot will encourage the formation of additional roots. Water well if conditions are at all dry.

Bamboo Canes 1.2m - Pack of 20
View ProductTransplanting Leggy Plants
If your tomatoes are a bit leggy and elongated, you can partially remedy this by planting deeper than normal and burying up to 2/3 of the plant, including the lower sets of leaves. Tomato stems have the ability to grow roots from buried stems; you can build a deeper and more extensive root system this way.
Tomato Crop Care
If you are growing cordon varieties (and chances are you are), you will need to pinch out any side shoots which form to prevent energy-sapping lateral branches from growing. The side shoot will appear at the point where a leaf branch meets the main stem. They can be nipped off with your finger nail when small, but will need to be cut with a sharp knife or secateurs if allowed to grow larger.

New tomato growers can often find it difficult to spot these shoots, and can confuse them with the start of a new fruit truss (you don't want to remove them!). If you are unsure leave them for a few days: if the shoot starts to produce leaves, off with its head!
Remember that the side shoot is always in the space between the branch and the main stem: once you get used to spotting them you will wonder why you ever found it difficult.
If fruit is slow to set in early summer, tap the plant support around midday to encourage the spread of pollen.
Outdoor Cherry Tomato 'Primabella'
View ProductIf you are growing in a greenhouse or polytunnel, keep it well ventilated (especially on hot days) to prevent issues with pests and disease.
'Stopping' Tomato Plants
Stopping is the practice of removing the main growing tip to prevent further fruit truss formation and to encourage existing fruits to ripen. If growing outdoors this is normally done when four or five fruit trusses have set, but in cold years it is better to stop when three trusses are present.
For polytunnel growing, seven or eight trusses can be expected - but in more northerly gardens or in a cold year limit the plant to five or six.

To stop plants cut off the top of the main stem, and continue to remove side shoots as normal.
Watering Tomatoes
Water well when planting out, and then lightly until the fruit starts to set. Once fruit is setting, water well with 12 litres (2 gallons) per plant at least on a weekly basis. Letting the soil dry out between waterings has been shown to improve flavour, but be careful with this: drought conditions followed by heavy watering can cause a growth spurt which results in split fruit.

Build Your Own Drip Irrigation System (16mm Parts Picker)
View ProductWatering will take a little practice, but keeping plants slightly on the dry side will intensify flavour. I have had good success with burying perforated plastic bottles in the soil between plants, which act as a watering reservoir.
- Cut the bottom of a 2.5 litre bottle and make numerous small perforations in the sides.
- Bury the bottle upside down with the lid on and fill when you are watering.
- The water will seep through the bottle walls and deep water the soil.
Feeding Tomatoes
Once the fruit has set, feed weekly with a liquid comfrey feed or a seaweed tonic formulated for tomatoes. It is worth remembering that tomatoes have two types of root: deep roots for transporting water to the plant, and shallow roots which absorb nutrients. When feeding tomatoes you are better to drench the soil around the plant with a feed solution rather than using the bottle reservoir above.

Comfrey Tonic Liquid Plant Feed
View ProductTomato Growing Troubles
Few pests or diseases trouble outdoor tomatoes; failure is usually caused by wet or cold weather. Leaves turning mottled, purple-veined or (on the underside of leaves) reddish is usually caused by nutrient deficiency, which is in turn caused by low temperatures.
Roots are unable to absorb nutrients when the temperature is cold. This can also be the cause of blossom end rot.
Fruit Splitting
A common problem with tomatoes caused by irregular watering, with some varieties more prone to this than others. A more regular watering regime should solve this problem.

Calcium Deficiency & Blossom End Rot
Blossom end rot is a dark and often rotting area around the base of tomato fruits, and is caused by a shortage of calcium. The cause may be underwatering, as calcium uptake is slowed in drought conditions. Again, a more regular watering regime should solve this problem.
Magnesium Deficiency
The symptoms are yellowing of the leaves while the leaf veins remain green. Older leaves are affected first. Remedy the problem by using ground magnesium limestone.
Tomato Pests and Diseases
Whitefly are the most likely pest to affect your tomatoes. The adult flies (they look like tiny moths) lay eggs on the underside of leaves. The growing eggs feed on the leaves, leaving a sticky secretion which attracts other diseases. As soon as you see the eggs, try spraying with water to wash them off and remove others by hand.
There is a very good biological control available: a tiny wasp which feeds on whitefly. 'Encarsia Formosa' eggs are available by mail order and should be used at the first signs of attack; if the plants have already become infested however it is too late.

Tomato Blight
This is caused by the fungus Phytophthora infestans, which is also the cause of potato blight. The signs are brown marks on the leaves which quickly increase in size. If left, any developing fruit starts to turn brown and rots.
Remove and dispose of the affected leaves. If this is done early you may be able to still harvest a crop of tomatoes; confine watering to the base of the plant to make conditions more difficult for the fungus.

Aphids (Blackfly and Greenfly)
Planting Marigolds really does attract beneficial insects such as ladybirds and hoverflies - and they love to feed on blackfly. Spraying the plants with water also works in the most rudimentary way: it simply knocks the blackfly off the plant.
For more methods of aphid control see this blog post.
Mosaic Virus
There are many varieties of mosaic virus which can affect tomatoes, but they can all be identified by leaves which turn yellow, then bronze and become distorted. This is a very infectious virus which can be transmitted by humans from plant to plant.

Harvesting Tomatoes
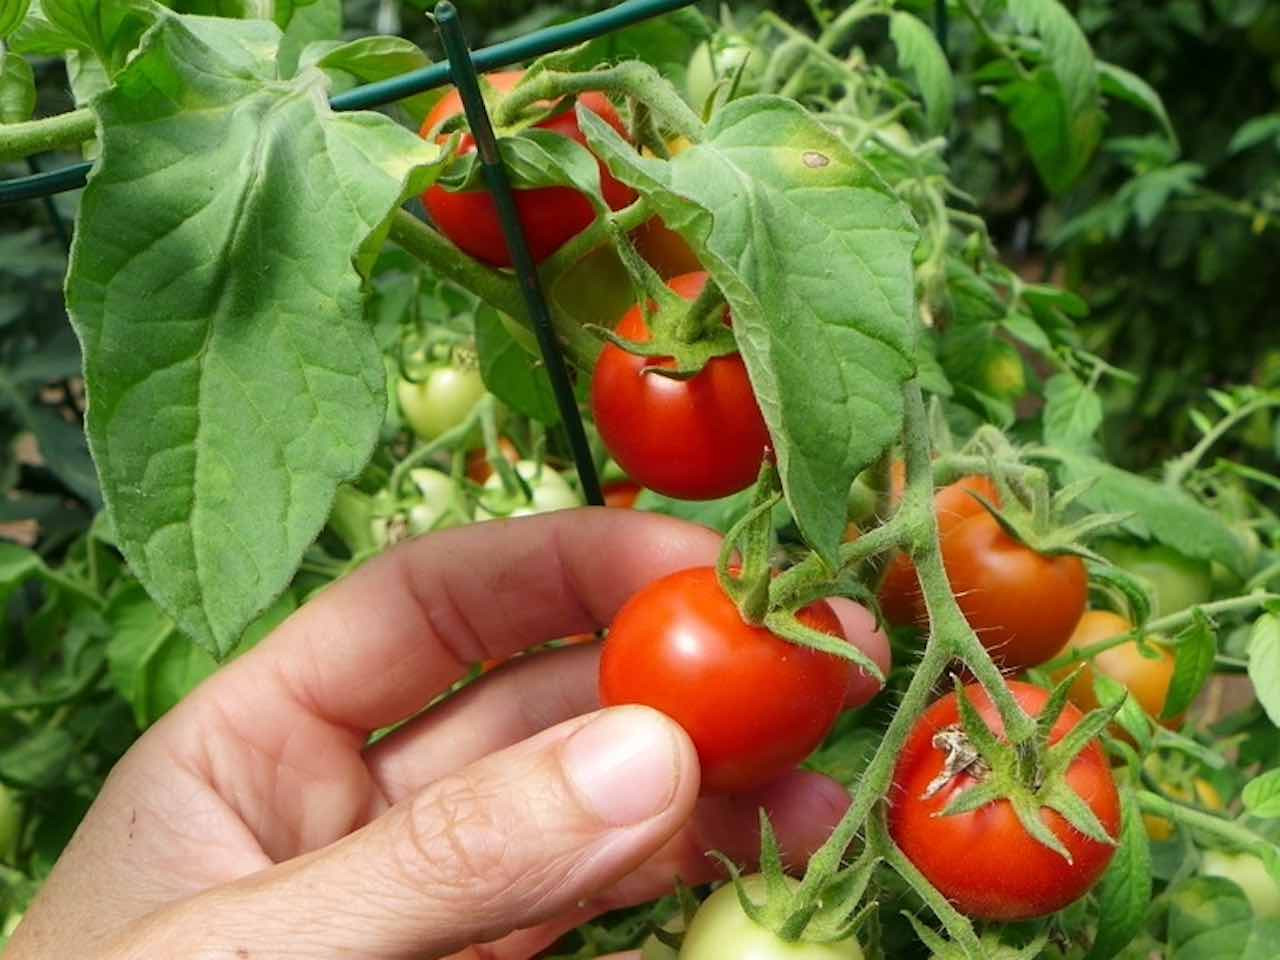
Pick as soon as the fruits are ripe (colour and size will identify this) for the best flavour, and eat as soon as possible! This also encourages the production of more fruit.
As soon as a frost threatens in October/November, harvest all the fruit immediately and ripen them on a windowsill. With upright varieties, it is possible to gently flatten the plants and cover with horticultural fleece to protect them from frost.

Rootgrow Mycorrhizal Tomato Starter (6 Plant Biscuits)
View Product
Storage
Wash and dry your tomatoes before storing. Unless you're planning to store your tomatoes for over a week, a windowsill, counter-top or bowl works fine.
If you know you won't use them in the next few days, then lower temperatures will help preserve the fruit. Storing in a fridge is not recommended, as the cooler temperatures can reduce flavour and cause mushiness. Your fresh-picked tomatoes should last longer on the kitchen counter than supermarket-bought ones, which are probably a few days old when you get them.


