How To Grow Perpetual Spinach
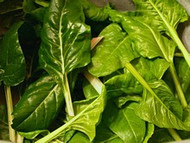
Perpetual spinach is actually a chard (beet family) but is very similar to true spinach in flavour. We prefer it as it is much easier to grow and far more vigorous than true spinach. It also has the advantage of constantly producing a new crop when picked and so is ideally suited to gardening in a small space. It's a biennial that is grown as an annual for its big crinkly leaves. The stalks are red or white with large, dark green leaves that can be used as lettuce is used.
Swiss chard is a leafy vegetable that favors colder weather. It isn't difficult to grow, but does require some maintenance as trimming the leaves frequently helps improve Swiss chard's flavor.
Where to Grow
Perpetual Spinach prefers well-worked soil with good drainage and a high organic content; it does not like acid soil.The crop needs enough water to keep the leaves growing quickly, so keep the soil moist at all times.
In selecting the location, you can plant Swiss Chard in the shadier parts of your garden, and where the soil is the poorest. While this plant is very forgiving, like any plant this prolific grower will respond to compost, manures and fertilizers.
To minimize the bitter mid-summer taste, make sure the plants get plenty of water. When you water the rest of the garden, don't forget the chard.
Let the outer leaves grow as big as you want. If you can't eat it as fast as it is producing, cut and discard leaves as they begin to wilt, turn brown or be damaged by insects. If the patch gets out of hand, do major surgery on the leaves. The inner leaves will take their place quickly.
When to Grow
Two sowings: First sow in spring for crops through summer and autumn. Or alternatively, sow after midsummer, for the heaviest production overwinter and through to the following spring.
Transplanting
With a dibber (Broom handle will do) make rows of 2-inch deep holes in the transplanting area. Plant seedlings to two to three inches apart. Swiss chard is quite tolerant to crowding, so don't worry if they appear too close.
Pop each transplant into the prepared hole, and don’t worry that you are planting them too deep. Plant the seedlings firmly, after which they should be well watered taking great care not to disturb the roots.
Crop Care
Chard prefers cool temperatures. High temperatures slow down leaf production, but chard tolerates heat better than spinach.
Pests and Diseases
Insect infestations are fairly uncommon. Occasional chewing and sucking pests will affect them, most notably aphids. Most infestations occur in mid-summer when the leaves take on a slightly bitter taste. For home gardeners, we do not recommend sprays. Discard any affected leaves. In our home garden, if an infestation occurs in the mid summer, we turn to another leaf vegetable, as Swiss Chard at this time of year is a little too bitter for our taste anyway. Keep removing infested leaves.
Harvesting
Swiss Chard can be picked as soon as the leaves are large enough to harvest, usually in four to six weeks.
The time from planting to harvest is 55 to 65 days. Start harvesting chard when the outside leaves are three inches long. Don't let the leaves get much longer than 10 inches, or they'll taste earthy.
Either take a few leaves off at a time or cut the entire plant down to three inches and let it grow back. If you harvest the leaves as they grow, the plant will go on producing all season.
Here's the best thing about Swiss Chard. As the weather cools, the leaves are their tastiest. Swiss Chard tolerates frost and freezes into the upper twenties. Even if a freeze kills off the outer leaves, the inner leaves may be protected. Cut away any frost damaged leaves. You still have chard to pick.
Storage
Store unwashed chard, wrapped in a plastic bag, in the fridge for up to three days.
Cooking
Chard’s leaves can be prepared like spinach, and its stalks like asparagus. In fact, its leaves serve as a good substitute for spinach in most recipes, but they will need to be cooked slightly longer.
Chard may be steamed, sautéed, or braised, and it can be added to soups, stews, and casseroles. The leaves and stems may be cooked and served together, or prepared separately as two different vegetables. The Italians make an egg frittata with chard.
For salads and sandwiches, it’s best to use young, tender leaves. For a simple side vegetable, leaves of medium size can be quickly sautéed—the stalks can be prepared this way, too. Older leaves and stalks are best steamed, boiled, or added to soups, as the stems require a longer cooking time to become tender than the leaves do.
Like other leafy vegetables, chard needs to be thoroughly washed before cooking since sand and other debris tend to nestle in its leaves. Instead of using a colander and running water over the leaves, the best way to remove debris from leafy greens is to dunk and soak them in plenty of water. Place the leaves in a large bowl, pot, or sink filled with cold water. Agitate the leaves one by one, then remove individual leaves by hand and place them in another container. Pour out the water and repeat the procedure until the water is free of debris. If you will be using the greens in a salad, dry them in a spinner.

