Ultimate Guide to Vegetable Harvesting
Those of you who are subscribed to our newsletter may already be familiar with this A-Z guide that I've been gradually putting together. It's easy to find sowing times for vegetables but sometimes it's not so clear when you are supposed to harvest them. Harvesting homegrown vegetables can be just as important as growing them, as some crops can quickly go past their best and lose precious flavour and texture. Harvesting at just the right time is important to get the best taste from some crops, while with other crops knowing when and how to pick them will encourage the plant to produce more crop.
We also get a fair few questions from new gardeners on how to know when a crop is good to pick (apart from harvest time), so I have tried to cover a few tell tale signs. I do hope that this guide is helpful or at least gives an idea of just how much variety there is when growing your own. I must admit that I have inspired myself writing it, as I have mentioned some crops that I haven't grown for years but am now looking forward to growing next season.
Asparagus
Harvest mid-April to end of May in third year
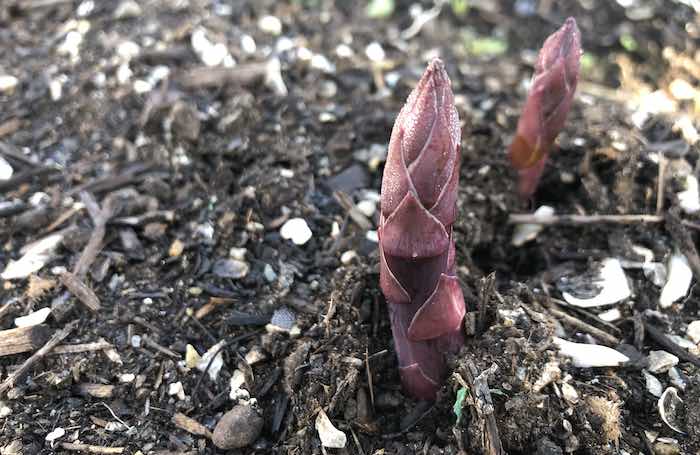
Asparagus should only be harvested in the third year after planting. Cut the spears at ground level taking care not to damage new emerging spears. If new spears start to get thinner, stop harvesting and leave till the following year. The maximum harvesting period for Asparagus plants is 6 to 8 weeks. After this you must let the spears grow on to produce ferns, which will process and transfer energy to the roots for the following season.
Broad bean
Harvest late June - August.
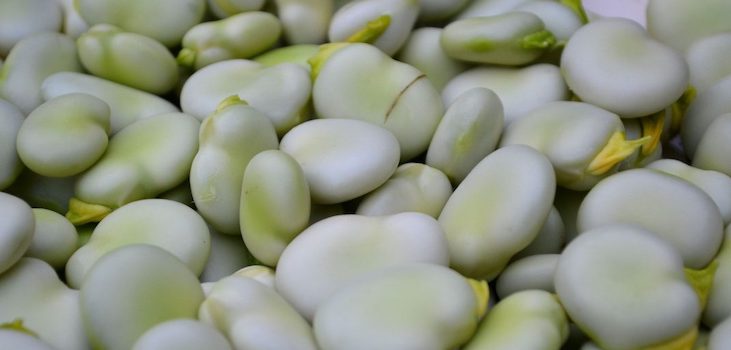
Broad beans are ready to harvest from late spring through to mid summer depending on when they were sown. The earliest beans, ready to pick by mid June, are sown the previous autumn (late October/early November) while spring sown varieties are harvested from July to mid August.

Bean, Broad Hangdown Green
View ProductThe point at which you harvest your beans will depend on how you like to eat them. Immature pods can be eaten whole when the beans inside are still very small.
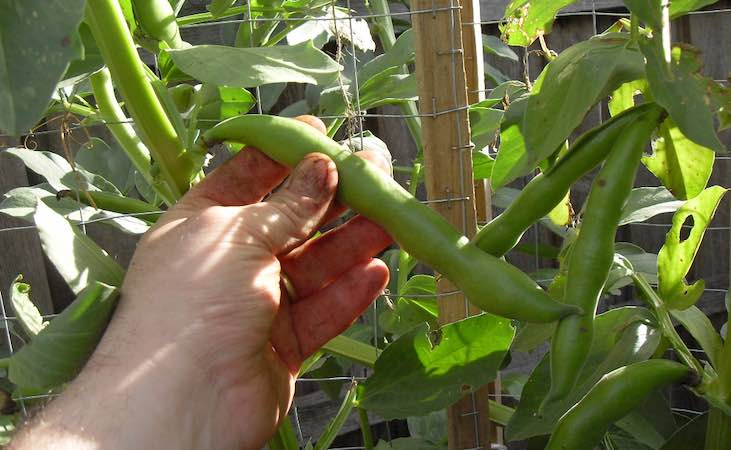
If you are growing for the beans themselves, wait until you can see the swelling of the bean inside the pod. The younger beans are sweetest and get progressively more mealy if allowed to mature on the plant. I prefer the more mature beans but they are a bit more trouble to prepare as the bean skin (not the pod) is tough so the tender inner colyledons (two seed halves) of the bean are best squeezed out. The period broad beans change from tender to mealy (and finally, past their best) is about 3 weeks.
French bean
Harvest late July - September.
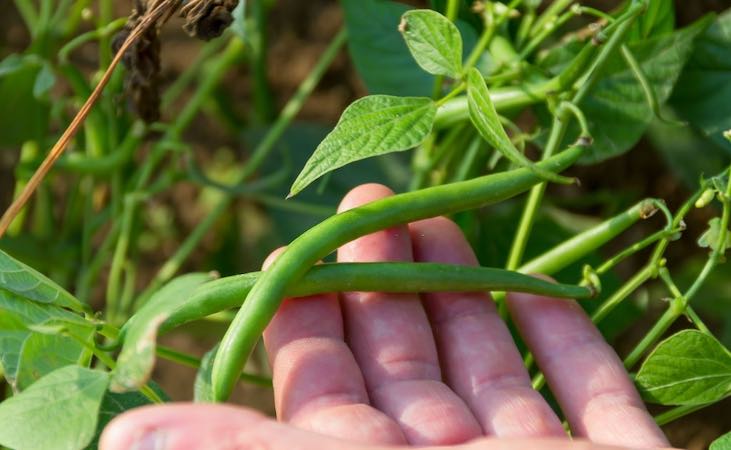
French beans are sown between May and June for climbing beans and May and July for dwarf varieties. The beans of both will be ready to pick approximately 10-12 weeks after sowing and will continue to produce new beans for 6-10 weeks depending on the weather (yield tends to be lower when it's hot and dry). Bear in mid that regular harvesting forces the plant to produce new flowers (followed by new beans) so, to achieve the highest yield, pick new pods twice a week.
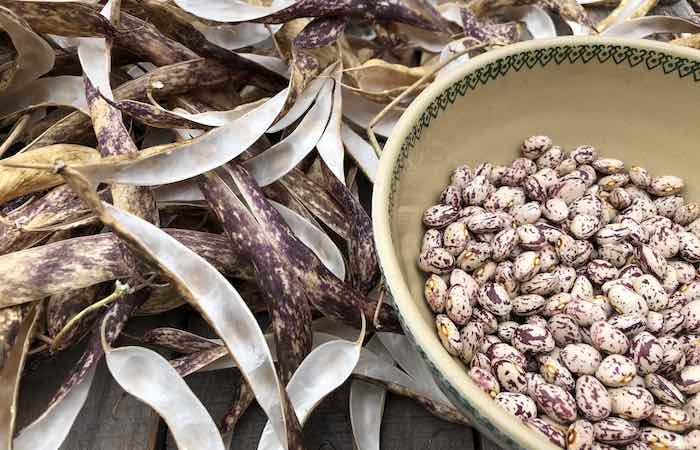
Unlike broad beans, French beans are best harvested when the beans are still very small as it is the tender pods we are interested in. If the beans are allowed to mature on the plants, the pods become tough and stringy (a process that only takes a few days). Some varieties of French bean (e.g. Borlotta beans) are grown for dried beans so are left on the vines until the pods are dry and papery when the beans inside have hardened.
Runner bean
Harvest late July - September.
Runner beans are sown from May until mid June and begin to produce beans 8-12 later, in late July and early August. When regularly picked, runner bean plants can yield a huge harvest and keep producing up until the end of September. Like French beans, runner beans produce new flowers in response to regular picking so it is important to harvest every 2-3 days.
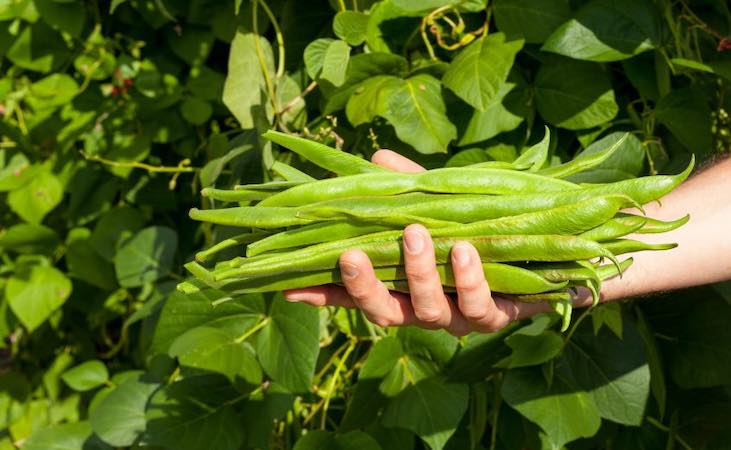
Pods are better when they are young and tender and get large and stringy very quickly (especially in warm weather) so, again, regular picking is important. To avoid stringy beans, it is best to pick pods at approx 25-30cm long when the beans inside are only just starting to swell. I might also make the point that runner beans are quite firmly attached to the vines so be careful picking as it is easy to damage your plants.
Beetroot
Harvest late June - November.
Beetroot can be sown as early as February undercover and up to the end of July so has a long potential harvesting season from June until November. A beetroot can be harvested at anything from golf ball up to grapefruit size depending on your preference. Large beetroot have a reputation for being woody but I haven't found this to be the case provided they get plenty of moisture as they bulk up. Obviously small roots are better for pickling due to their size but, in terms of eating quality, I don't think you will notice any difference in flavour between small and large.
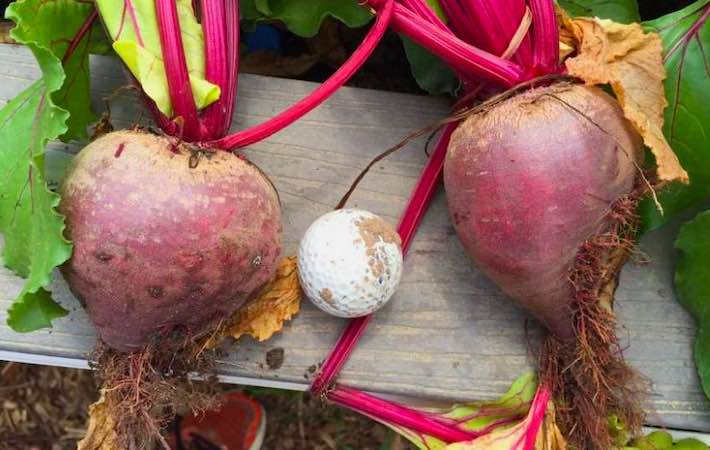
It is easier to grow beetroot in clumps of 4 or 5 roots (sow a few seeds per cell in a modular tray and plant out each clump without thinning) which results in each root bulking up at a different rate. To harvest, choose the biggest from the clump and twist rather than pull out which prevents damage to neighbouring roots. By following this practice you will end up with a row of relatively large beetroot at the end of the season; this is what you want as large roots keep better than small ones (large roots have less surface area relative to the flesh to loose moisture through).
Broccoli sprouting
Harvest late January - April.
Sprouting broccoli is more commonly sown from April until June and is used as an overwintering crop that produces spears from January until the end of April (depending on the sowing date and variety). There are also summer varieties (e.g. 'Summer purple') which will produce a crop in late summer and Autumn from an April sowing. You should also be aware that early sown overwintering broccoli can start sprouting in early winter if unusually warm (which is happening a bit recently), so it's no harm to check on it in warm winter weather.
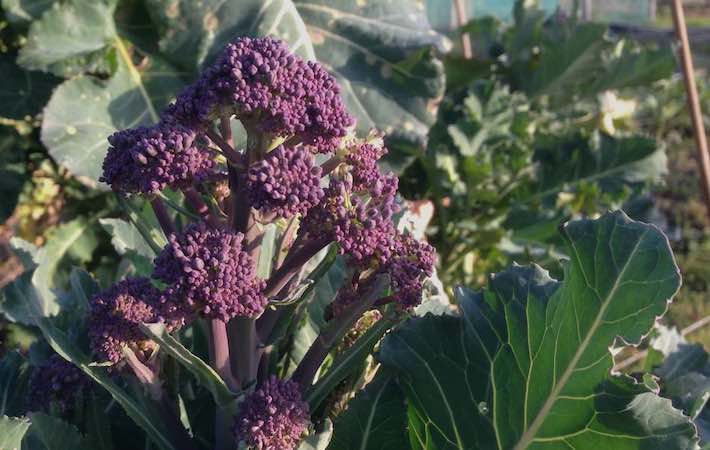
The first heads are always the biggest and, when harvested, will lead to numerous smaller heads as the plant continues its attempt to flower. The broccoli spear is an immature flower head which will eventually open to produce a cluster of yellow flowers and for this reason, harvest timing is important.
The tell tale sign of the first heads forming are new leaves starting to curl inwards over the growing tip. Once the head is visible, keep an eye on progress and pick when the little flower buds are nice and tight, the ones in the image above are just about perfect. Flowers are still edible as they open but the stems become more woody and, as the homegrown broccoli connoisseur will tell you, the stems are the best bit.
Broccoli calabrese
Harvest June - October.
Calabrese is relatively fast maturing in broccoli terms and can produce the first large head 12-14 weeks after sowing. Large headed F1 hybrid calabrese varieties can be sown up until the end of June but open pollinated heritage varieties can be sown until mid July and and will provide smaller spears until the end of October.
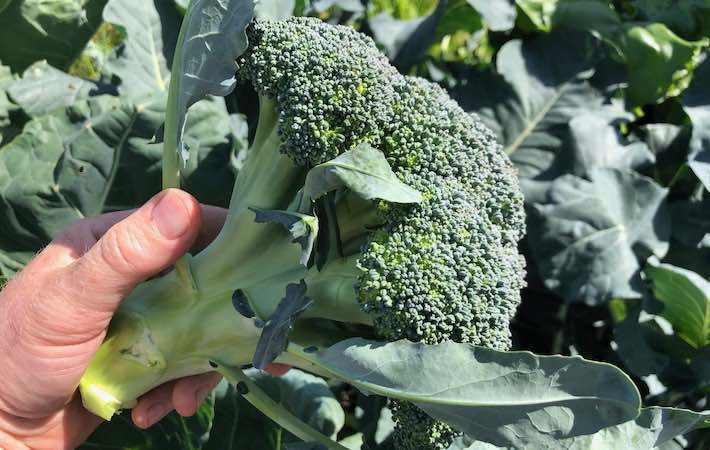
As regards when to harvest, the same close attention applies to calabrese as it does to sprouting broccoli, even more so as it is growing in a warmer part of the year so everything happens more quickly. If you are not pushed for space, you can also leave a calabrese plant in place after removing the main head, it will produce numerous smaller heads around the severed top.
The image above was, BTW, taken yesterday from one of our test beds outside the warehouse. You may recall a couple of weeks ago that I mentioned our new soil mix trials which are now yielding excellent results. This head was grown in our new 'Supersoil Mix' and was planted and then completely ignored. That means no weeding, feeding or watering yet we still ended up with this monster. Need I say more?
Brussels sprouts
Harvest October - March
Brussels sprouts are sown in April or May and will mature from October through to the following March depending on when you sowed them and which variety you have chosen. Once established, sprout plants grow quickly through the summer but slow down in Autumn when buds start to form where the base of the leaf joins the main stem.
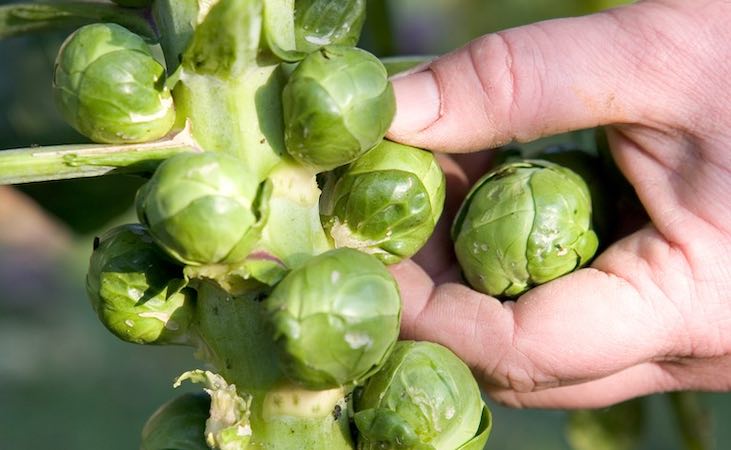
Sprouts mature from the base of the plant upwards with the first few being relatively small and of poor quality (they are usually grubby from soil splash back during rain). As sprouts mature they turn from dark to a lighter green when they should be picked while they are still tight buttons. To pick, hold the sprout between thumb and fingers and push down to snap off which can take a bit of force. By harvesting from the bottom up as the sprouts mature, you are pushing down into a vacant space making each sprout easier to break off.
Sprouts that have begun to open out can still be used but the outer leaves tend to discolour which means more work in the kitchen and the chance of rot setting in. You should also remove any yellowing leaves from the stem as they die back otherwise they droop down and rot against the developing sprouts.
Cabbage
Harvest April - Feb
Cabbage is a little more complicated as regards harvest time as we have spring, summer and winter varieties which enable a harvest for nearly 12 months of the year. Spring cabbage is sown in August for April harvests, summer cabbage in March to April for August and September harvests and winter cabbage in May and early June for heads from October through to the following February or early March.
The main issue with harvesting cabbages is that, if allowed to sit in the ground too long, they will grow too large and split. This happens quicker with solid ball head summer cabbages due to their density and speed of growth in warm summer weather; spring and winter cabbage are more forgiving in this regard for the opposite reasons. The time at which cabbages are at their best will depend on sowing date, variety and the weather for the season but here's the gist of it:
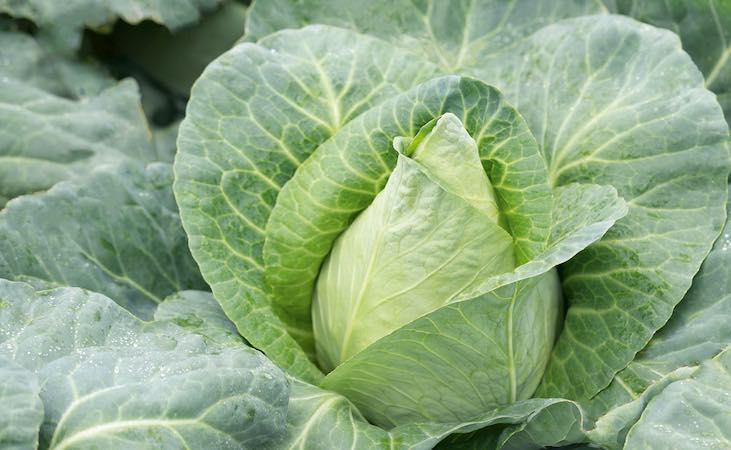
Spring cabbage
Harvest April - early May
Spring varieties are more often pointed e.g. 'Durhan early' or 'April' so don't produce the traditional round head that novice growers might expect. They reach maturity from April to early March with a conical cabbage head which, while reasonably firm, won't be solid like a ball head summer cabbage.
If maturing in April and the weather remains cool, mature spring cabbages can sit in the ground for a number of weeks without deteriorating so don't require regular checking. I should also mention that some spring cabbage varieties (e.g. 'Greyhound') can also be sown in February or March for harvests in June and will pass their best quicker due to warmer temperatures and faster growth. To harvest, simply cut the main stem an inch or so below the head.
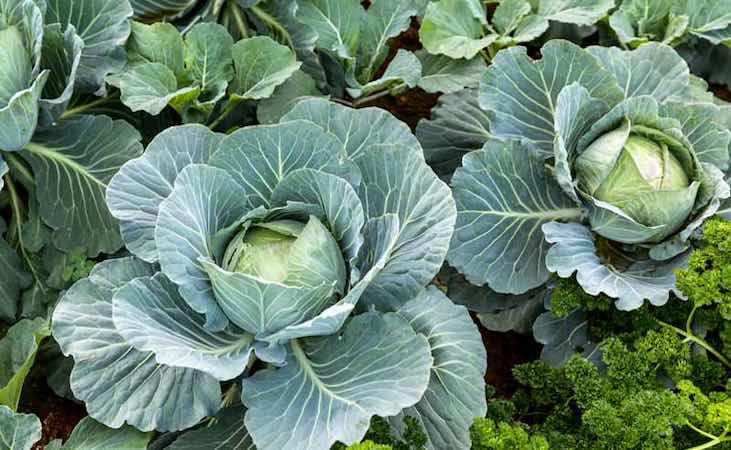
Summer cabbage
Harvest August - September
Summer cabbages e.g. 'Stonehead' are more often hard, dense heads which, as we said, can split quickly if you don't keep an eye on them. You need to be particularly vigilant if a dry period is followed by rain due to the resulting fast growth. It is also good practice to remove any dying large leaves from around the head as they will attract slugs (both with the dying leaf and the shade they provide) who may decide to make a meal of the parts you want to keep.

Cabbage, Summer 'Stonehead F1'
View ProductAs with any cabbage, to harvest cut with a sharp knife just below the head. I often see it advised to leave the cabbage stalk in the ground as it will produce 3 or 4 mini cabbage heads just below where you have cut. In practice, the mini heads are just that, very small and really not worth much apart from as a curiosity, I would be inclined to dig them up and use the space for something else.
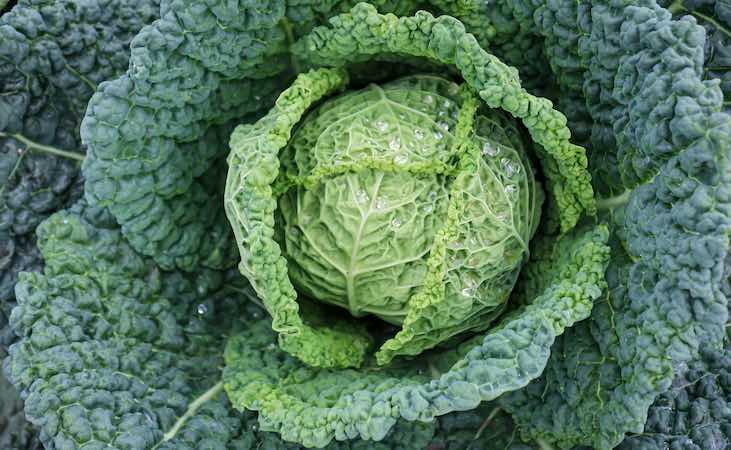
Winter cabbage
Harvest October - February
Winter cabbages are probably the easiest in terms of getting them at the right time because growth in cold winter temperatures is so slow. Crinkled leaved winter savoy types (above) as well adapted to cold conditions as their leaves trap air making the heads less dense on less likely to freeze. Most of the growth will have taken place before mid November (when it gets too cold) so essentially the cabbages will sit there until you need them. The fact that pests aren't active in winter is also a bonus, this goes for spring varieties too which mature before the slugs and other pests are up to speed.
Carrot
Harvest June - November
The main issue with both growing and harvesting carrots is carrot root fly whose larvae tunnel into the roots making them unsightly and unsuitable for storage. The fly lays eggs twice a year, in May and then in August and September so by adjusting sowing times we have a better chance of a good crop. The issue with harvesting carrots while the flies are about is that the aroma of bruised carrot foliage will attract them and result in more eggs and therefore more damage.
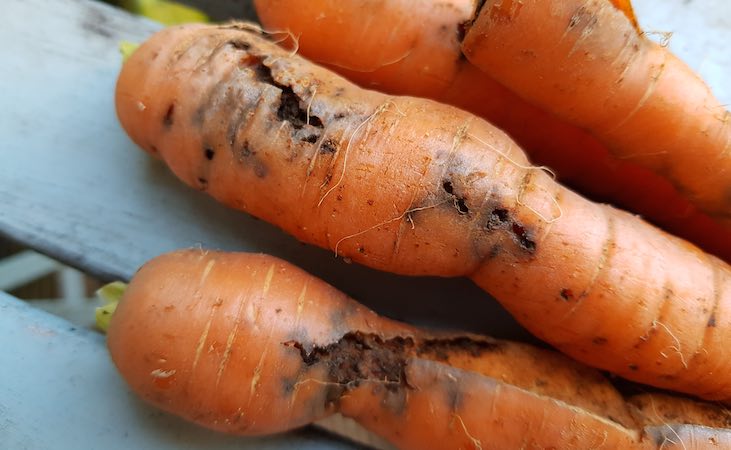
By sowing an early crop of carrots (e.g. 'Amsterdam forcing' or 'Early Nantes') in March, you can have a decent harvest by May or early June. Root fly is not such a big deal with earlier crops as the carrots are not generally kept for storage so there will be less time for damage to be done. The issue with winter stored carrots is that the grubs will continue tunnelling the stored crop which will eventually render them unusable.
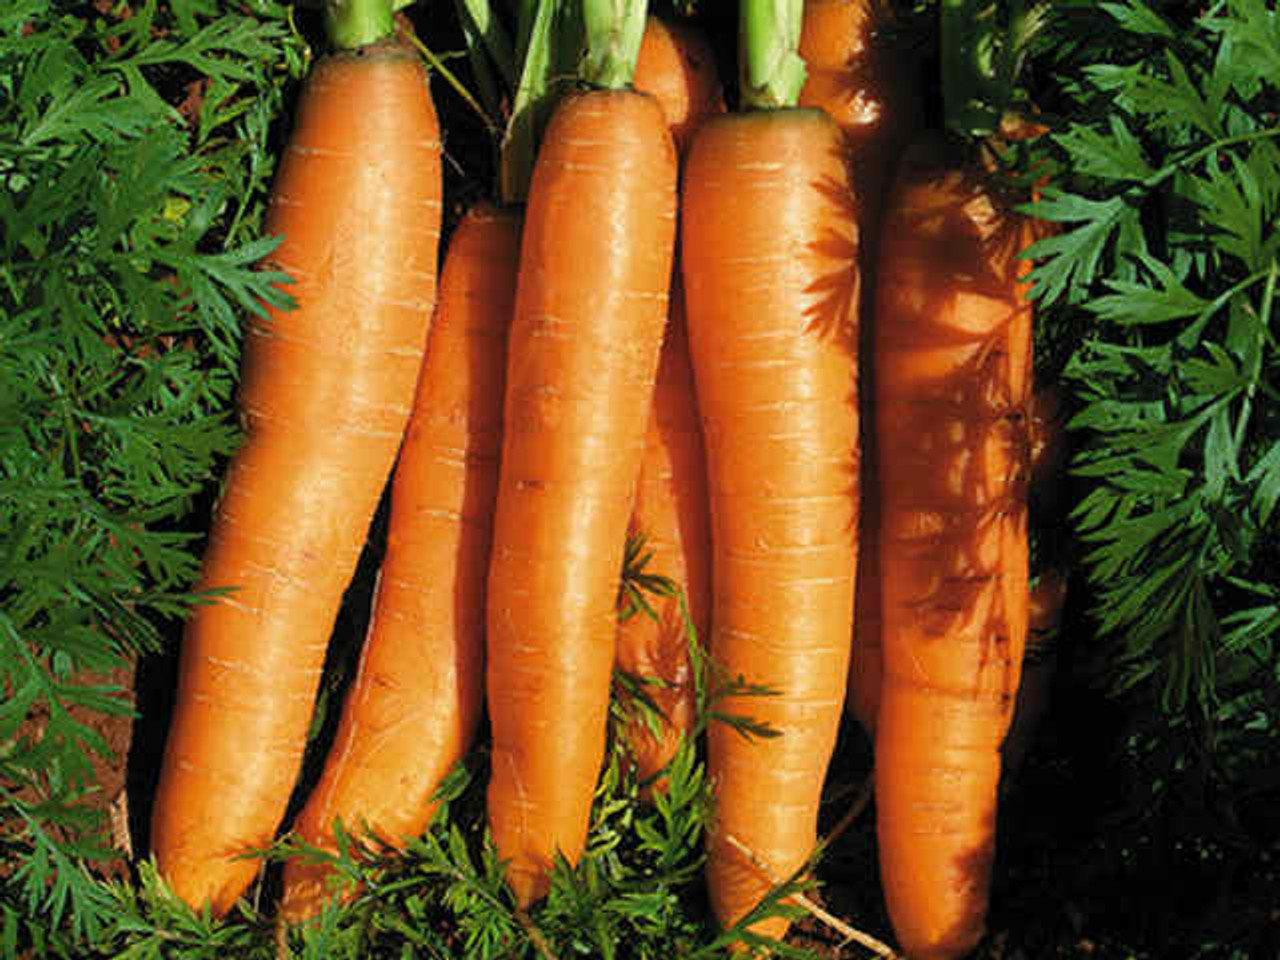
Carrot Early 'Nantes'
View ProductBy delaying the second sowing (for winter storage) until mid June you will avoid the first generation and can exclude (mostly...) the second generation by covering with an insect mesh from the end of July until October. The (long winded) point I am trying to make is you should avoid harvesting any of your winter crop until mid October no matter how tempting it might be. Even if you have your crops covered with mesh, by opening to harvest you will let flies in that often become trapped inside when the cover goes back on.
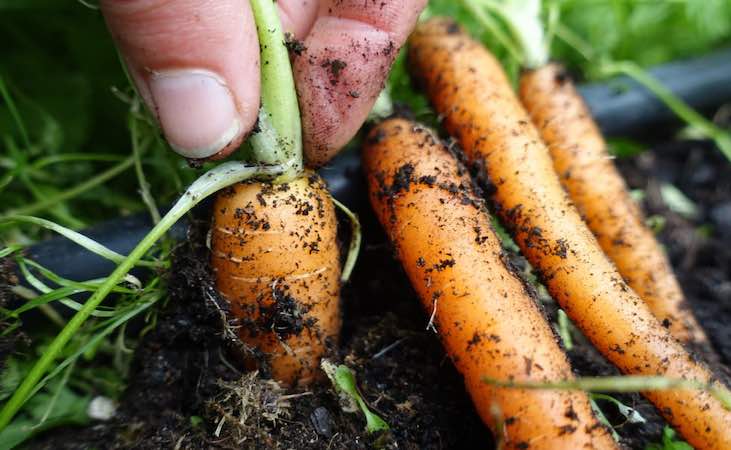
Carrots can be harvested at any size you wish (outside root fly season!), you will know when they have reached a reasonable size when you see the shoulders push above soil level. You then have the option to harvest the largest roots and leave room for the rest to grow larger or lift the full crop.
For stored carrots it is best to lift late (end of October) if you don't have root fly or early if you think you have a problem (so you can use the carrots before they get any worse).
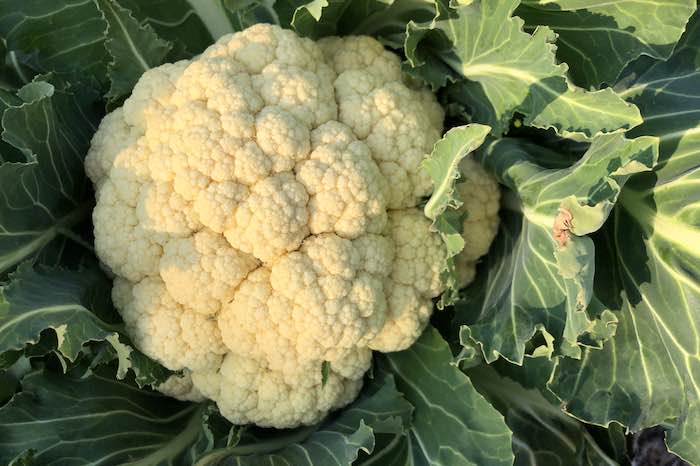
Cauliflower
Harvest April - November
Cauliflower is more commonly sown in March or April for harvest in June or July but can be sown later (up to mid July) for Autumn harvests (using a suitable variety, e.g. 'All year round') of smaller heads. You can also sow overwintering varieties like 'Aalsmeer' (above) in June for a very welcome harvest the following April.
Cauliflower can be tricky to grow and equally tricky to harvest because it deteriorates fast once it is ready to pick. As with broccoli and calabrese, a cauliflower head is also a tight cluster of flower buds which want to continue growing and produce yellow petaled flowers. What we need to understand is that, unlike an apple or a tomato, the cauliflower head isn't the end its lifecycle but rather the mid point so is in a constant state of change.
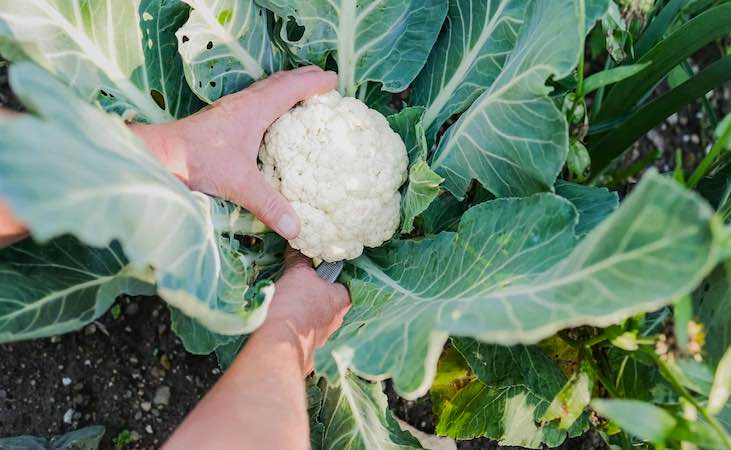
Again, the better that conditions are for growing (warmth and moisture for cauliflowers), the faster they will mature so you need to be on your toes in summer. You will know when heads are starting to 'go over' as they start too loose their compact, tidy shape and change from a bright white to more of a creamy yellow colour. I have had great success, btw, with overwintering 'Aalsmeer' as heads formed in cool April weather will stand for longer than summer crops.
To harvest cauliflower, cut with a sharp knife below the head. There is no benefit in leaving the root and remaining leaves in the ground so it is best to remove and add to the compost heap.
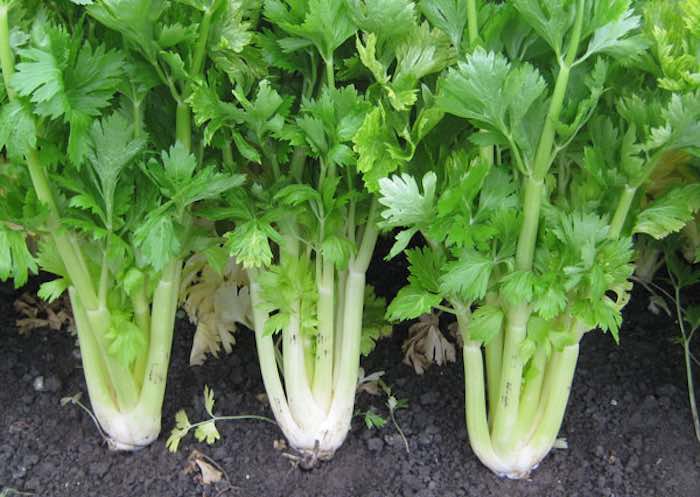
Celery
Harvest August - October
Celery is sown in April and May and will be ready to harvest from August through to November depending when you sowed. The trick with growing good celery is plenty of moisture (it is a wetland plant), this is important at any stage but especially in the 6 weeks before harvest time.
The other thing to remember is that it is almost impossible to produce the thick and juicy stems you see in the shops which are grown under strictly controlled conditions. Homegrown celery tends to have thinner stems and is better harvested on the young side for eating fresh; it will grow tougher as it gets bigger but will also have a stronger flavour so is still excellent for cooking. I am just saying don't hold out for shop type stems as you won't get them.
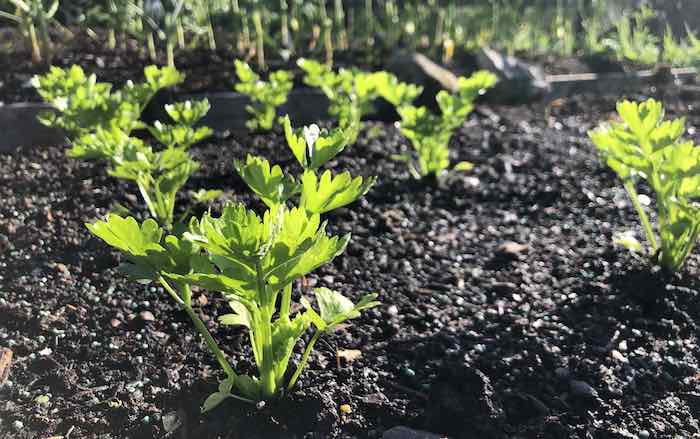
Celery is best planted in blocks of 25cm each way which will result in the canopy blocking out light when the plants get large enough (which blanches the stems), the best time to harvest for fresh stalks is in the couple of weeks just after the canopy has closed over.
Celery is cut with a sharp knife at soil level which will result in some smaller secondary stems to grow from the root, handy if you're not pushed for space but not worth it if you have a follow on crop ready to go in (e.g. garlic).
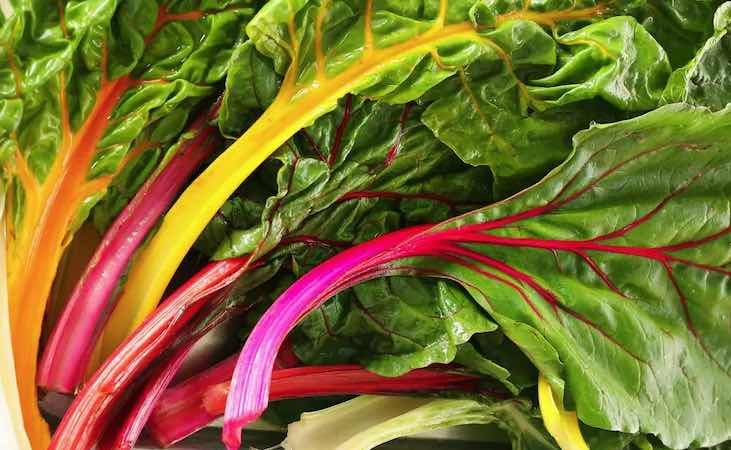
Chard
Harvest April - November
Chard is a leafy relative of beetroot that is very easy to grow from an April to July sowing. Chard is also a relatively hardy plant and will survive milder winters before sprouting new leaves in late March and April, it will finally run to seed in May.
The other significant advantage is that chard keeps producing new leaves after it is picked meaning from a single sowing of a few plants you can have leaves for around 8 months of the year. It depends on your preference as regards harvesting, smaller leaves can be used in a salad while large ones are better cooked. The leaves will grow very large if allowed to but will be tougher and more bitter so I think it is better to harvest regularly from 3 or 4 plants.

Chard 'Swiss Chard'
View ProductPick in the same way as you would rhubarb, by grasping the base of the leaf stalk and pushing down with a bit of a twisting motion. Cutting will do the same job but isn't ideal if you want to keep your plants going for a long season, this is because the remaining stump can rot and introduce disease.
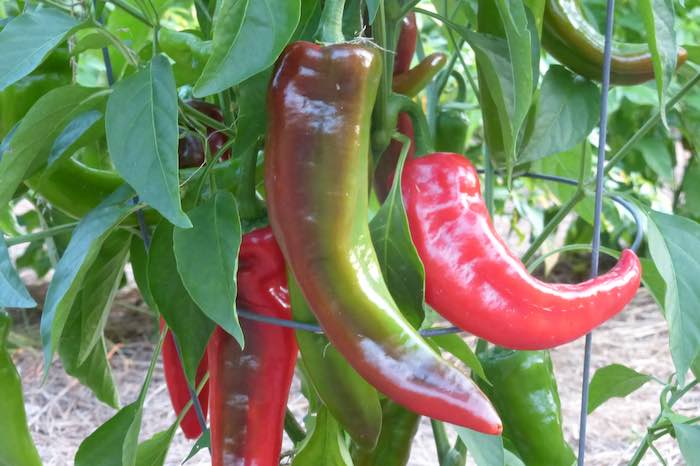
Chili & sweet pepper
Harvest August - October
Chilli and sweet peppers are sown early in the season, in February or March. As they are warm climate crops, they need the summer heat to produce fruit and will be ready to pick from August to October. The thing to remember is that most (but not all) peppers will start off green before changing to yellow, orange and finally red when fully ripe. The green or red peppers you buy in the shops are the same pepper at different stages of ripeness.
As you will know, red peppers are sweeter than green so, if you want the sweetest, you will need to wait until October before harvesting your crop. On the upside, if some of the peppers are picked when green, the overall yield of the plant will be greater because picking encourages new flowers (and therefore fruit).
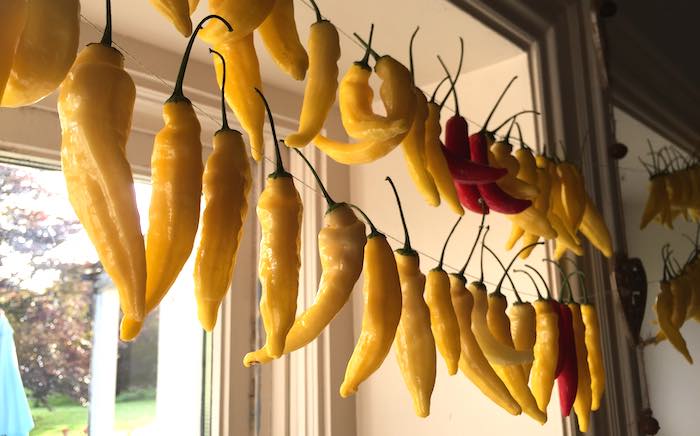
The stems of pepper plants snap surprisingly easily, especially at the point where branches meet the main stem. Sweet peppers also have strong stalks connecting them to the plant so it is not unusual to break off a full branch in error. The safest method is to use a pair of secateurs to cut them off.
Chilli peppers, being smaller with thinner stalks, can be harvested by pulling the fruit upwards but, again, care is needed not to damage the stems. Chillis can be dried for storage by running a length of thread through the stems with a needle and hanging indoors in a warm window.
Courgette
Harvest late June - early October
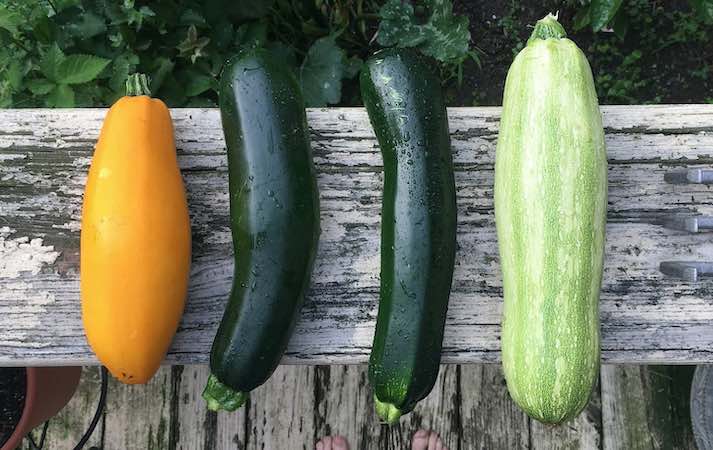
Courgettes are frost tender plants so are sown in May or early June for harvesting in June through to October. The plants are very prolific (sometimes too prolific) and produce many fruits over the growing season. The first few fruits are of poor quality and often rot where the flower joins the fruit so are best cut early to promote a new batch.
Courgettes, if left to their own devices, will grow into very large marrows so are better harvested small when the texture is firmer and flavour better, I prefer them at around 20cm long. Harvest size is a matter of taste, I am just saying that finding a recipe for a few 20cm courgettes is a lot easier than dealing with an enormous marrow.
It is better to cut off courgettes if you want them to store for a week in the fridge, if harvesting for immediate use, simply snap them off.
Cucumber
Harvest late July - October
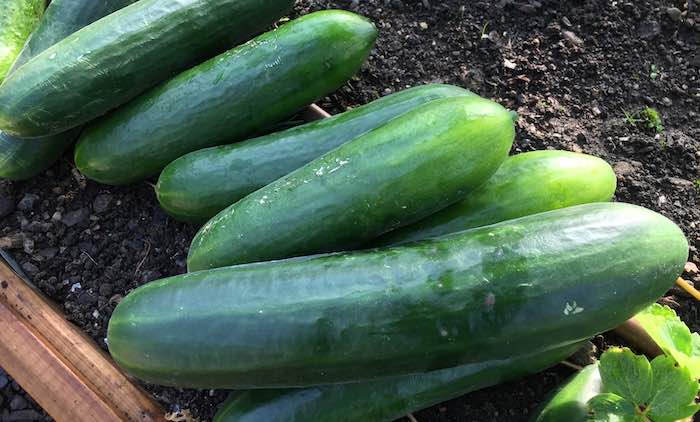
Cucumbers are another warmth loving summer crop, they are sown in late April or early May for crops from July to October. The photo above shows some different size fruits from the same 'Passandra' plant which produces masses of short and juicy cucumbers. The point at which you harvest is again up to your preference, the more common size would be the fruit in the top left of the image but larger ones are also very good.
Homegrown cucumbers allow you to a experience a much broader range of flavours and textures because shop bought varieties are almost always harvested at the immature stage. Try them at different levels of maturity up to the point where they begin to go yellow. Personally I prefer fruits a little larger as the flesh is juicier and more aromatic but it depends what you are using them for.
Cucumbers of any size are easily harvested by rotating the fruit until the stem breaks. Remember that an indoor cucumber plant in full production will produce a new fruit nearly every day in summer and ripen very quickly, in a matter of days.
Fennel (bulb)
Harvest late June - November
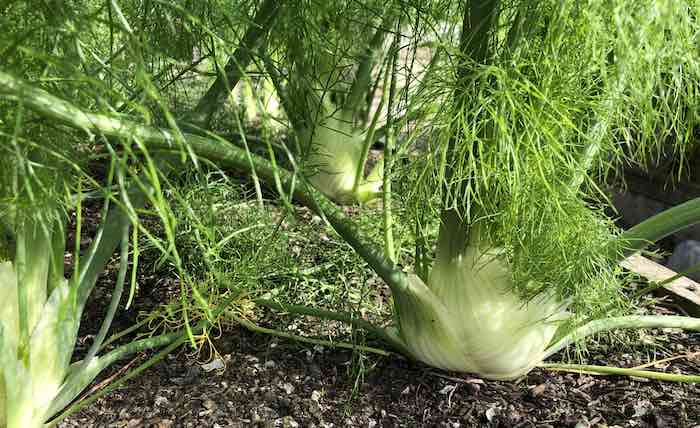
Due to its tendency to bolt if sown early, bulb fennel is best sown after mid May until July and will be ready to harvest from June to November depending on when it was sown. Bolting or running to seed is the principal problem which will be more likely for earlier sown crops and is why fennel is particularly well suited to Autumn growing.
As regards harvesting, you will notice the fennel bulb starts to swell after about 6 weeks from sowing and are ready to harvest about 2 weeks later depending on where you are in the season. Autumn harvested fennel progresses from bulb to flowering more slowly so they will sit in the ground for longer until you need them. In summer you need to be pretty quick when they have reached a decent size bulb as the will quickly slip past their best.
To harvest, twist the bulb to break the root out, trim the root and leaves. Both the root and leaves can also be eaten, the feathery leaves have the same flavour and can be used in the same way as herb fennel.
Garlic Harvest
late June - early July
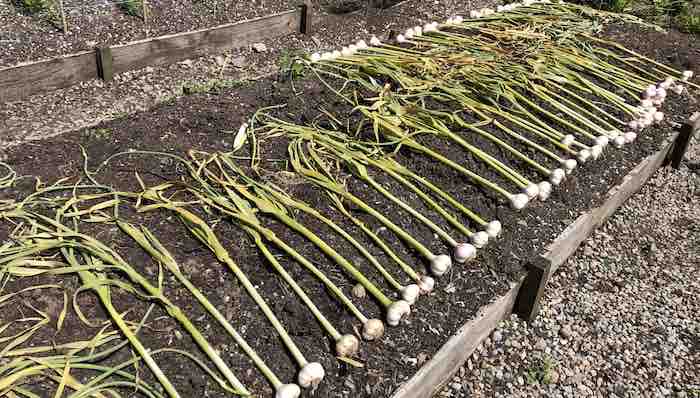
Individual garlic cloves are planted from October to the end of February and will be ready for harvest between June and early July. Obviously, those planted in Autumn will be ready first but Autumn and spring varieties are still harvested at more or less the same time with Autumn varieties usually producing larger bulbs.
It is often advised to wait until the leaves have begun to yellow before harvesting but this will likely result in reduced storage ability as there will be less of a protective sheath around the bulb. Each layer of papery skin on a garlic bulb is the continuation of a leaf layer so, if the leaf is dying off, so is your garlic 'wrapper'. To check readiness, scrape the soil back from around one of your plants to see the size of the developing bulb. If the spring had been warm, expect them to be ready in mid June, in a cool year it may be up the the beginning of July but no later.
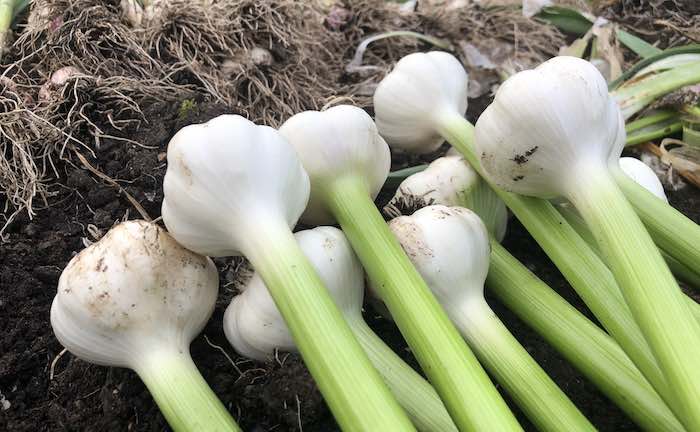
To harvest, slide a trowel under the bulb to sever the roots, taking care not to damage the base of the bulb. Pull upwards to break the remaining roots. In sunny weather, leave the garlic out to dry for a week or so before taking in for storage. In wet weather they can dried indoors but be careful with a greenhouse or polytunnel as very hot temperatures and strong sunlight can soften bulbs and reduce storage potential.
Another advantage to harvesting on the early side (and having more layers of wrapper) is that you can transform grubby bulbs into the pristine white beauties like those above by peeling off a spare layer of skin. It is also a good idea to trim off roots at this stage as they are easier to cut then when they are dry.
Kale
Harvest late September - April
Kale is more commonly sown in June or July for winter harvests as it was traditionally thought of as a winter vegetable but since it's recent fame as a superfood, it now enjoys an extended growing season. June or July sowing will give a harvest from September through to the following April but you can sow as early as March undercover for summer cropping.
As regards harvesting, you can start picking the lower leaves (pick from the bottom up) when plants have got large enough to touch each other. By harvesting a few leaves at a time, kale will keep producing for many months provided you don't pick the cluster of small leaves at the centre of the plant which is the growing tip.
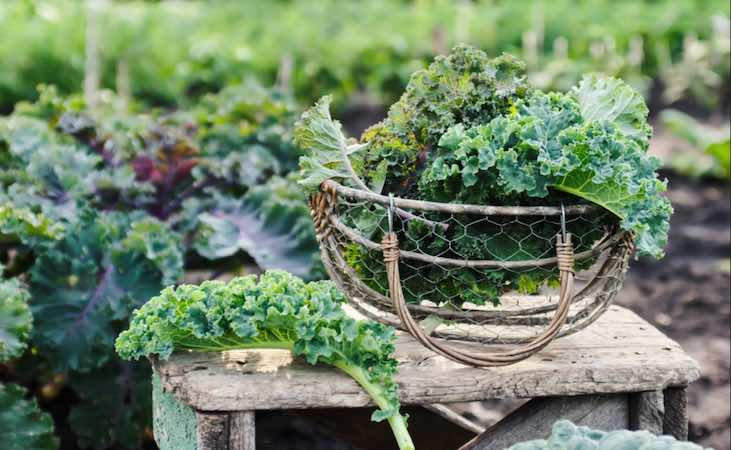
There are many types for kale with very different leaf shapes (e.g. curly kale in the basket, Russian kale below) but they are all harvested in the same way. Grasp the leaf stalk firmly at its base between fingers and thumb and push downwards to snap it off.
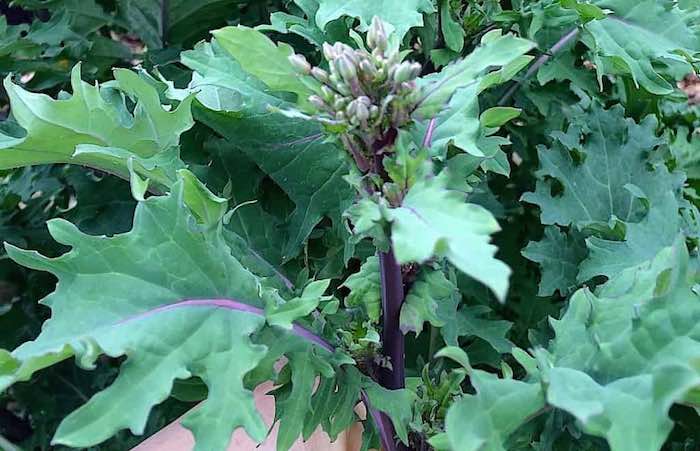
By November and by harvesting from the base of the plant, your kale will look like a mini palm tree with a long stalk and a tuft of leaves at the top of the plant. Kale will easily survive most winters and, though growth will be very slow, there will be pickings of small leaves over the coldest months. When the weather begins to warm in late February and early March, plants will begin to grow tender flower shoots and baby leaves which are a welcome addition to the late winter kitchen.
Regular picking of flower shoots will encourage more until flowers begin to form (above) in early May. The harvests of shoots and immature flowers are exceptionally tasty and tender, in my opinion the best bit so well worth waiting for.
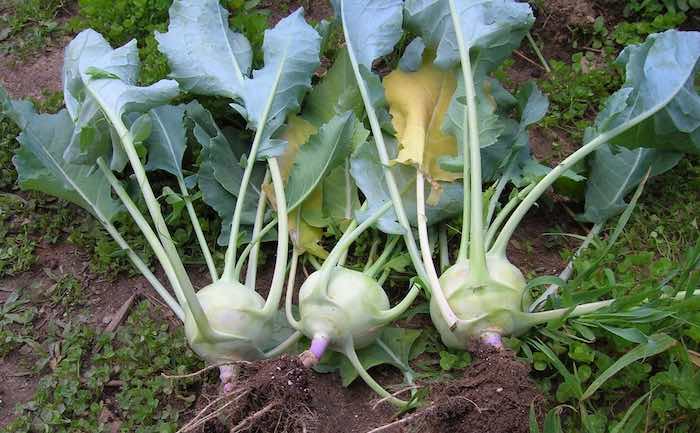
Kohl Rabi
Harvest May-November with repeated sowings
Kohl Rabi is in danger of getting woody if left to get too large - with the optimum size being about the size of a tennis ball. To lift either pull the entire plant or cut below the base of the swollen stem, leaving the root in the ground. Use straight away or trim the outer leaves (but not the central tuft) and store in boxes of moist sand in a cool, dry place. It may stand over winter in mild areas but quality will deteriorate if not protected by a straw mulch, fleece or cloche.
Well, that's a lot to be going on with in one blog post - and your eyes probably need a rest if you've got this far. The Part 2 follow-up post is here.
