An introduction to pruning apple trees

The best time to prune apple trees is in late winter or very early spring before any new growth starts. The tree takes up a dormant state after shedding its leaves and before sprouting new buds. Pruning is best completed just before growth starts in the Spring as cuts will heal quickly, cuts made in early winter will be open and unprotected until growth resumes in late March so a possible entry point for disease which you will want to avoid.
Pruning can look like a complicated process that can put some people off but is in fact relatively simple once you learn the basics. I've included a list of terms below which might be worth reading before we get stuck in, I'm hoping they will make it easier to understand the article.
Common Pruning Terms
Dormant - A tree is in a dormant state in the Winter approx between November and February. At this time the leaves have fallen and the tree's energy is conserved in the roots, trunk and main branches.
Flower bud - Flower buds are larger and more plump than growth buds and have a downy surface. Flower buds produce flowers which mature into fruit.
Wood or Growth bud - Growth buds are smaller than flower buds, they are more pointed and grow flush with the branch.
Outward facing bud - Any growth bud which faces away from the centre of the tree.
Terminal bud - The growth bud at the tip of a branch. Removing the terminal bud will stimulate the buds below to produce woody side shoots which will become new lateral branches.
Spur - Fruiting branches which produce apples, they look like small and stubby compressed stems with fruiting buds.
Leader -The leader is a clear central-leading branch that grows upwards ahead of the other branches.
Scaffold or Lateral branches - Scaffold branches are the main supporting branches of the tree.
Crossing branch - Crossing branches are branches that cross each other creating a dense canopy in the centre of the tree.
Downward branch - A downward branch hangs down from a lateral or scaffold branch, these will never produce fruit and should be removed.
Whorl - A whorl is where three or more small branches originate from the same location, it is common on unpruned mature trees.
Water Sprouts - Water sprouts are thin branches which normally grow straight up from lateral branches and do not bear fruit.
Suckers - Suckers are unwanted shoots which grow near the base of the trunk.
Dead Wood - Dead wood is as the name suggests any dead or diseased wood. Dead wood will be obvious when the tree is in leaf due to lack of any leaves but can also be recognised in Winter as it is dark and brittle, often with bark falling away.
Why Prune? There are 3 reasons to prune a fruit tree:
- To establish the basic structure of the tree making is easy to maintain.
- To remove any dead, diseased or damaged wood to keep the tree healthy.
- To allow sunlight to access the ripening fruits.
I'm sure if you've noticed the best fruit is usually at the top of the tree? This isn't some sort of cruel trick to make your life more difficult it is because this part of the tree gets the most sunlight. It is helpful to keep the purpose of pruning in mind when deciding what branches to cut, we're not just tidying the tree, we're shaping it for optimum fruiting. Optimum fruiting means getting as much fruit as possible exposed to as much sunlight as possible and we do this by shaping the tree as follows:

Tree shape As we've said, one of the main purposes of pruning is to get more sunlight to the fruit and this can be done by either pruning to a conical shape (central leader), a more rounded tree (modified central leader) or a vase shape (open centre). The conical shape gives the greatest yield and is most common so that's what I'm looking at here but the same practices apply to all. First you need to learn how to control a tree by pruning and training, you can then create any shape you wish.
Identifying growth and flower buds. Again, understanding your tree makes a big difference in how you prune it and one of the most important lessons is what the buds look like. A growth bud produces a branch but no fruit while a flowering bud will produce a flower which matures to become an apple. We prune above growth buds to shape the tree and prune flower buds to adjust the yield of the tree.

Growth or wood buds (Left) Growth buds are much smaller than flower buds and grow tight in to the branch or stem. They are slender and more pointed and look more scaly than downy.
Flower buds (Right) Flower buds are larger and more plump than growth buds and have a downy surface. You will easily see the difference in growth and flower buds by November. Flower buds grow on spurs which are short, stubby branches where the fruit is produced.
Pruning above growth buds allows you to control the growth of the tree by choosing a bud facing the direction you want to new growth to go in. Pruning above a growth bud facing towards the interior of the tree will result in the shoot growing inwards while a bud facing away from the tree will produce an outward facing shoot. If we are creating an open tree with plenty of sunlight on the fruit we therefore want to prune above outward facing buds to produce nice outward spreading branches.
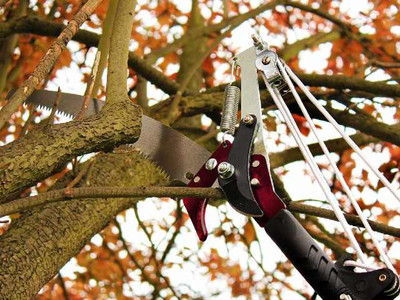
Pruning cuts There are two types of pruning cuts: thinning cuts and heading cuts.
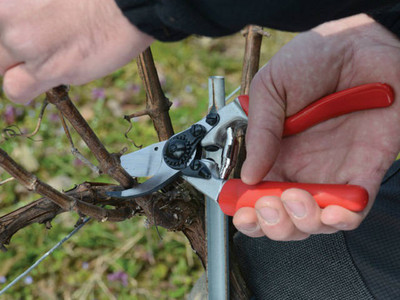
Thinning cuts Thinning cuts remove entire branches or limbs, paring them back to their point of origin where they meet another branch. Thinning opens the interior of the tree to receive more sunlight and channels energy into the remaining branches. The thinning cut is the preferred type of cut for pruning apple trees.
Heading cuts Heading cuts are made anywhere along the length of a branch or limb to produce more vigorous growth below the cut. This growth is often weakly attached, however, with narrow angles that form between the original branch and the new growth. Heading cuts are necessary when pruning young trees, mature trees seldom need lots of new branches so heading cuts are made less frequently as the tree ages.

Ok? Let's get started - The 3 D's. The first easy job (as a bit of a warm up) is to attend to the 3 D's, this means removing any Dead, Diseased or Damaged limbs. Dead limbs are easily recognisable as they will be brittle and snap easily while diseased wood tends to be a different colour than the surrounding branches. Damaged timber may occur where branches have crossed and rubbed against each other or where a branch has partially broken under the weight of the previous season's apples.
Cut timber back to just above the nearest bud on healthy wood. Attending to the 3 D's can and should be done at any time of the year to prevent spread of disease to the rest of the tree.

If you are removing a large lateral branch the method is to make 3 cuts to avoid the branch tearing at the trunk as it falls. Make the first cut below the branch about 6 inches from the trunk, this cut should be about a third of the distance into the branch.
The second cut is made about 3 inches below the first, you may need to cut all the way through but it is likely the branch will snap off when you reach the depth of the first cut.
You will be left with a stump with can now be safely removed from the tree. The branch should not be cut tight to the trunk but left proud by 3-4 cm, this leaves the branch collar which will grow over the wound in time and re-seal the tree.

Heading cuts and outward facing buds To stimulate new growth we use a heading cut anywhere along the length of a branch. A heading cut is made just above a growth bud which will cause a new shoot to grow from the direction the bud is facing. You are looking for an outward facing bud because this will result in a branch growing away from the tree.
Heading cuts are used more when establishing young trees with very few branches, they are your opportunity to shape the tree. They are used to establish the main branches, a heading cut on a single central leader will produce a horizontal branch. In general heading cuts should be avoided once the initial shaping has been completed as it can result in an overcrowded tree. If you need to use a heading cut to shorten a long and thin lateral branch make the cut in old wood as this results in less new growth.

Pruning suckers, whorls and water sprouts. Suckers, whorls and water sprouts will never bear fruit and will produce a dense, leafy canopy rather than the bright open tree we're aiming for so need to be removed. Whorls and water sprouts are often the result of ill advised heading cuts in more mature trees.
It makes sense to prune these out now as once removed you can see the shape of your tree more easily for your final training and fruiting pruning.
Cut all three offenders with a thinning cut as tight as you can to the branch or trunk, they all look quite similar as they are thin, whip like branches with growth buds along their length. You can see typical water sprouts in the photo opposite. When cutting suckers also trim any branches which are within 4 ft of the ground as they will be too shaded to produce apples.

Remove downward growing and crossing branches. Basically you are trying to create a tree with well spaced lateral branches. Any branches which interfere with your tree shape and create a dense framework should be removed.
Downward growing branches will also be shaded and unproductive while crossing branches can cause a wound from rubbing together which will be an entry point for disease. Crossing branches also provide a haven for moisture if a callous develops as in the photo making the area prone to rot. Use your now familiar thinning cut to remove complete branches.

Remove vertical branches to leave the central leader. Now you have cleared away much of the confusion in your tree you should he able to see its shape more clearly. In the photo you can see the main leader leaning towards the left of the photo. You can see side branches growing vertically competing with the leader which need to removed because they close off the top of the tree and shade the fruit below when in leaf. Cut right back to the main leader as shown with the red marks.
Next thin out any interior wood that doesn't conform to your desired tree shape taking care not to remove more than 1/3 of branches. Your tree should start to resemble the diagram below with defined lateral branches rather than a full and bushy centre.

Finally prune the upper branches back so they are shorter than the lower branches. Make sure you use thinning cuts taking branches back to their origin as pruning cuts will result in bushy growth at the top of the tree.

Pruning Flower Buds A spur bearing variety produces flower buds on spurs which can become crowded after a number of years growth, a crowded spur will produce smaller fruit which may not ripen properly. Spur systems should be pruned to leave only 4 or 5 flower buds which will give you decent size fruit. You can remove a complete spur branch containing many flower buds to leave a single branch with the desired amount of buds.
See you next week!
Andrew